Vegetables Every Day

Vegetables Every Day
Carrot Tarator with Beets
Showing posts with label Greens. Show all posts

Wednesday, March 22, 2023

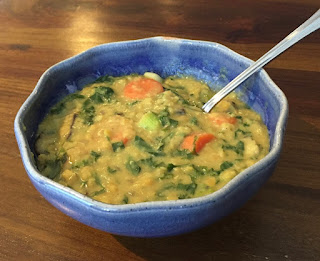
Lentil Stew


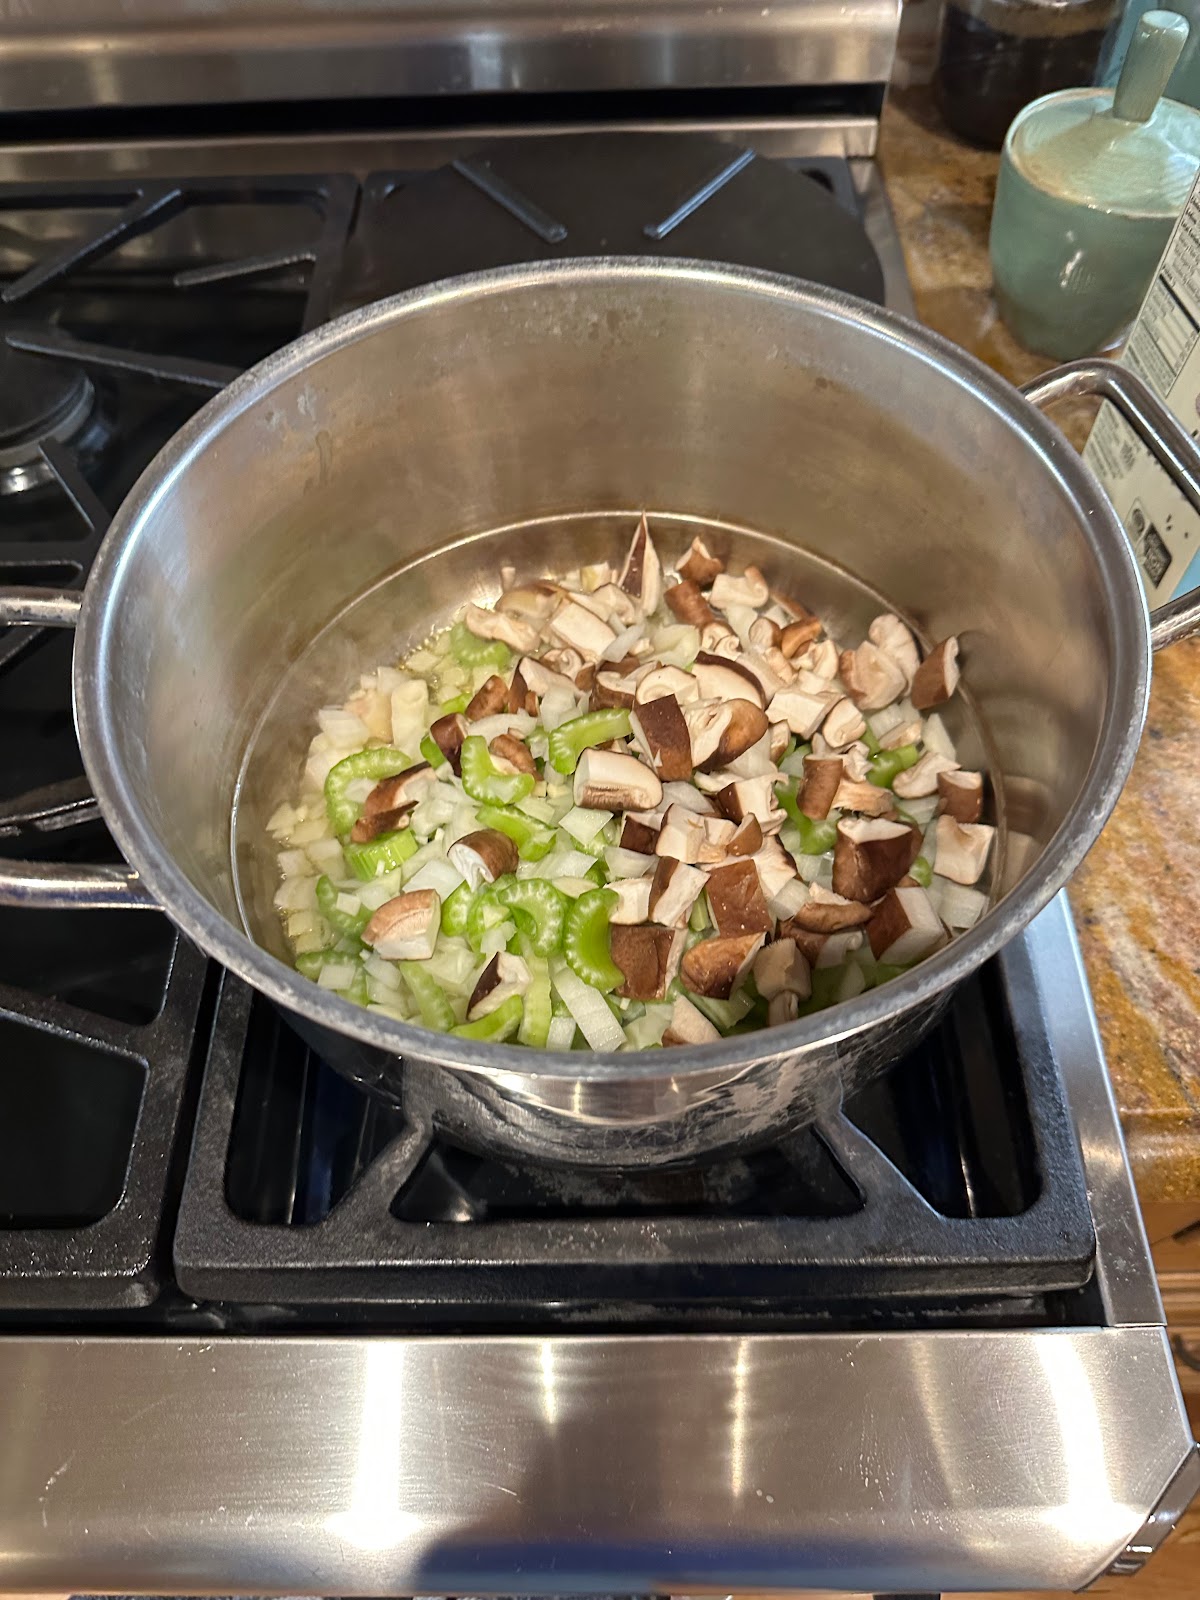
The last post I did was for a bean stew... since then there have been 12 atmospheric rivers dumping a record amount of rain in California.  So I am still making bean stews!  This is an update of a winter squash and bean stew that I do with lentils.  Lentils have all the wonderful protein packed benefits of beans, but they cook much faster: 20 - 30 minutes.  Plus they grow with much less irrigation than other crops like wheat and corn. I'm sure we will sometime soon find that important again. And while I love winter squash in stews, they are gone from the markets, but this works well with pretty much any vegetables you have around.  I added mushrooms and cabbage to this soup along with extra carrots. Plus as always a bunch of greens - in this case I used collard greens which I love in soups.  

 
Rosemary and Bay from the front yard

Don't hesitate to add plenty of red pepper, or some hot sauce at the end. Yesterday's batch was a bit under seasoned - I added a nice spoonful of salsa which gave it a nice kick.  

Here's what went into yesterday's batch: 


Chop and saute: 


Cook .. Just 30 minutes!

Add greens (chop first): 


And its done!


 The recipe: 

Vegetable and Lentil Stew with Sausage

This can be a clean the crisper drawer kind of soup, with any kind a vegetable


1-2 tablespoons olive oil 

1-2 slices of bacon (optional, good if you don’t use sausage)

2-3 links of pre-cooked chicken sausage (or use pork sausage – sauté instead of bacon)

1 large onion, chopped

1 to 4 carrots, sliced 

1 or 2 celery stalks, sliced (optional)

2 cloves of garlic

Red pepper flakes to taste

Rosemary (1-2 teaspoons fresh), bay leaves (2-3), and/or Italian Seasoning

More veggies as desired: mushrooms, cubed butternut squash or sweet potato, green beans, tomatoes

6 cups of liquid - 1 quart chicken broth plus 2 cups water (or all water or all broth)

1 pound of green lentils, rinsed 


1 bunch of greens (kale, mustard, chard), stalks removed, chopped (or baby spinach)


Herbs, lemon juice, salt, pepper, hot sauce to taste.


In a large pot, heat the oil.  Sauté the bacon if using.  Add onion, sausage, celery, garlic, chili (plus any veggies that would benefit from sautéing like mushrooms), plus salt to taste (I start with a ½ teaspoon).  When onions are translucent (5 minutes or so), add carrots and other vegetables, rinsed lentils, broth / water and bring to a simmer.  Cook for 25 or 30 minutes, until lentils are tender (don’t cook to the point of falling apart).  Add more water if desired. Add chopped greens.  Kale or mustard greens need to cook 5 to 10 minutes; baby spinach is done as soon as you have stirred it in. Taste – add salt, maybe a squirt of lemon juice, herbs, some pepper, maybe some hot sauce as desired. 

Monday, April 13, 2020

Quarantine Eating

So what have you been cooking for the pandemic?  It's clear that I gravitate to the kitchen and cooking for stress relief, but not sure that's it a net benefit considering how stressful grocery shopping has been.  Seeing empty shelves is kind of scary (on top of the risk of being out in public).  Plus we have been getting a good portion of our food delivered, mostly though Amazon Fresh, which is frustrating trying to find things in stock and getting delivery slots. But I have filled my freezer with plenty of soups and stews "just in case" and doing a better job that normal at using up all of the things in the corner of the pantry and bottom of the freezer. 

I am grateful for so many things ... so far my friends and family are all healthy, we have a nice house, live someplace where we can get out for walks and runs, great neighbors, technology that lets us get together virtually.    Now if it would just stop raining!

Some of what I have been cooking ... some new recipes and some old: 

 A new recipe, Pasta with Chickpeas  from Melissa Clark at the NYT cooking.

This one is destined to become a favorite.  I pretty much followed the recipe, although I only had a half bunch of parsley.  I did use fresh cooked chickpeas ... my neighbor had a couple of pounds in the back of her pantry that were "at least" a couple of years old and was unsure how to cook, so I volunteered to cook in my pressure cooker...  I soaked them for 12 hours and cooked for 12 minutes in the pressure cooker and they were great. I'm grateful for great neighbors! Of course I haven't seen dry chickpeas in the stores, but the local store here is starting to get canned ones again.


I also found a tart crust recipe I like. What's great about this is that you can just bake off one small tart and save the dough for later. I have not tried the filling in this recipe, the filling was a freezer discovery, some lemon curd that I made year, topped with some Greek yogurt and chocolate chips. I sometimes make things and put them into the freezer for a rainy day.  We had over 3 1/2 inches of rain last week, so that counts as a rainy day! 

I have been getting what are essentially CSA boxes from my favorite farmer at the Farmers market.. including lots of beets.   


My try at Pickled Beets was successful.
There have been lots of meals with green incorporated in them...


Like Curried Lentils (this is with beet greens). I was able to get lentils last week at the local store, and this recipe will work with green lentils too, its just not as pretty. And Spinach Swiss Chard Crusted Quiche with Fennel and Sausage.  In a stroke of genius, I oven roasted the fennel, onion, and sausage in the filling on a sheet pan (at the same time as cooking the crust) .. one less skillet to wash and less total time.  

And we have not had to sacrifice our lunch salads..   And in case you think every meal is all healthy and green like this, the salad is incorporating some left-over take-out fried chicken from a local restaurant (doing our part to support local business...).
There are also lots of meals with wheat and cheese ... 


Like pizza (I have been experimenting with a no-knead crust) and Macaroni and Cheese.


Also in the comfort food category was Meatloaf.    And the mini-loaf I froze came out great.  I thawed in a bowl of cold water (took about an hour), then it needed to bake for about 45 minutes. 

Plus some simple dinners, like a loaded baked sweet potato and the quesadillas  pictured with the beets. 

And the normal...Foil Grilled Fish, (using up some fish a neighbor gave us last fall)  Stir fry,  and "Whatever" Pasta
  
I've also been experimenting with no-knead bread ... but that's another post.   Stay well, and let me know how you are doing!


Saturday, December 29, 2018

New Toy: Breville Pressure Cooker


Did you get a pressure cooker for Christmas?   I got one last year, and still have mixed feelings.   It is a pain to get out, set-up, and clean, but it does a few things very well:

1. Make broth.   You get broths that are full of gelatin in about 2 hours.
2. Braise meats, especially chuck roast for barbacoa or stew.  Also handy to cook up chicken legs.
3. Hard cook eggs, because they peel easy.   Every time.
4. Cook beans... just be aware there is a lot of variation in cooking time.
5. Cook grains, although I haven't played with this much. 

The biggest misconception about the pressure cookers is that they will get dinner on the table quickly.  Just because the cooking time for beans might be 10 minutes, that doesn't mean dinner will be on the table in a half hour.   To cook a pot (1 lb) of beans, it takes a 25 minutes or so to get up to pressure, 20 minutes to cook, then at least another 45 plus minutes to depressurize... all of the sudden, you are looking at an hour and a half, which is about how long it takes to cook beans on the stove.  The advantage is that its totally hands off cooking, no waiting for it to come to a boil, turning down to simmer and on my stove, getting frustrated because you can't maintain a slow simmer.  And sometimes you can depressurize more quickly, although this is not recommended for beans, or anything that might have a layer of fat on top (like braised meat).

One other thing I'm still working on is the cooking time.  Most recipes have cooking times that are just too long.    I have a Breville Fast-Slow Pro, not an Instapot like everyone else, I am guessing that it runs a bit higher pressure.  The good thing is the preset times are generally pretty good and help make a good guess to start, but beans are still a challenge.   The best reference I have found so far to cook beans is this page from Rancho Gordo...  it really gives you a feel on how different the times are for soaked vs. unsoaked, and for different varieties of beans.

I made this a couple of nights ago... and was really happy with the result.  Soaking the beans allows the beans to cook in the same time as the squash.  Seemed the perfect dish after all of the holiday meals. 


Winter Squash, Lima Bean and Kielbasa Soup (Firecooked)


This is a take on my beans and greens soup.  It comes out quite well in the pressure cooker, and this combination makes a very pretty soup.  If you don’t have a pressure cooker, it will cook just fine on the stove.


1 pound dry white lima beans

1 tablespoon olive oil 
1 large onion, chopped
2 carrots, sliced
2 cloves of garlic, minced
1 small butternut squash, peeled, seeded, cubed
12 ounces smoked kielbasa, sliced (about ½” slices)
Pinch of red pepper flakes
½ teaspoon salt, or to taste

1 quart chicken broth
2 cups water

1 bunch collard greens, de-stemmed and chopped

Rinse the beans in a colander, then put into a large pot and cover (by a couple of inches) with water.  I use the cooking pot to do the soaking as to not get another bowl dirty.  They should soak at least 6 hours, but not more than 10 or so.  Drain the beans when ready to start the soup. 

In a pressure cooker, heat the oil on the sauté Setting.  Add onion, carrots, garlic.  Add the squash and Kielbasa as you get them chopped.  Add a bit of salt (the sausage is usually quite salty, so you don’t need much more) and the red pepper flakes.   When onions are translucent add the drained beans, broth and water.  Beans should be covered by a ½ inch or so of liquid.   Set to pressure cook using the bean setting (high pressure) for 5 minutes, and natural release (total cooking time on my cooker is about 1 hour 15 minutes).*  Check to make sure the beans are done, and the salt level is ok. Cook longer if needed.  Add the chopped greens.  Put on sauté function to bring back to a boil, turn off and let the greens cook for about 5 minutes.    Serve with a bit of black pepper.


* If you don’t have a pressure cooker, just simmer on the stove.  Guessing it will take about 1 ½ hours.. start checking after the first hour. 


Wednesday, July 19, 2017

Curried Lentils


I'm thinking that Trader Joe's should be sponsoring me. 


This take on beans and greens has quickly become a favorite.  It has a flavor profile that's different from a lot of what I make, and its really quick to put together.  I like curry, but certainly not an expert.  I do know that curry powder is a mix of spices, and that your grandmother from India wouldn't be using some mix out of a jar.  But, so far, I have made this with 3 different kinds (ranging from the above Trader Joe's curry powder to one I bought in London) and they have all been good... although maybe not authentic. I'm guessing a canned curry paste will work too. No matter what kind of curry you use, realize the heat level between brands can vary considerably.  If in doubt, use less, as you can always add some more at the end.  

Besides the curry, what makes this different from my normal lentil soup is coconut milk, it adds a nice richness (and keeps you from noticing there is no meat). And to my friends in Arizona:  even though this is a stew, it's still good to eat on a warm day. 


And like other lentil or bean stews, this freezes very well.  I just put 1 serving into a 1 quart ziploc freezer bag, press out the extra air and seal.  Freeze flat.  When ready to eat, put the bag into a bowl (or sinkful) of hot water.  When thawed (about 5 - 10 minutes), dump into a bowl and heat a couple of minutes in the microwave.  And then garnish.


Freezer Ready


Curried Lentils

6 servings

1 tablespoon oil  
1 large onion, chopped
3 to 4 carrots, sliced 
2 - 3 cloves of garlic, minced
2 - 3 teaspoons minced fresh ginger
1 teaspoon salt
~ 2 tablespoons curry powder (to taste)
1 pound red lentils (or regular green lentils), rinsed
4 cups of water
1 can (13.5 oz) coconut milk
1 bunch of greens (kale, mustard, chard), large stalks removed, chopped, or a bag of baby arugula.

Garnish:  Chopped avocado, yogurt, cilantro, fried egg, and/or lime wedges

Heat the oil in a large pot.  Sauté onion, carrots, garlic, ginger, and salt until onions are translucent.  Add curry powder, stir well, and then add lentils, 4 cups water, and coconut milk.   Cook about 30 minutes, add a bit more water if needed to just cover the lentils.  The red lentils should break down, or green lentils should be soft.  Add chopped greens.  Kale or mustard greens need to cook about 5 minutes; baby arugula is done as soon as you have stirred it in.   Taste -- add salt or more curry, if needed.    

Garnish with chopped avocado, yogurt, cilantro, and/or lime wedges.  To make hardier, add a fried or poached egg, or serve over rice. 


Friday, February 20, 2015

Cooking lesson: Chicken and Kale Stew


My 80+ year old father-in-law is working on learning to cook.  We have collaborated on one dish (Ken's Chicken Dinner) that I consider a winner.  I'm defining a winner as something that you are willing to make (and eat) every week or so.  I'm hoping we have a second winner.

But I think that an important part of learning to cook is to make the same thing over and over.  To get a feel of how hot, how brown, what is enough (or too much), how to season.taste.   To be able to make it without reading step by step through a recipe.  To know what substitutes work.

I think that I'm also getting a better idea of the ideal type of dish that he likes to make:

1. One pot
2. Tasty but not too spicy
3. Not too much chopping
4. It should not make too much
5. It should have some meat in it, preferably chicken
6. Gluten free

Of course, I then add my constraints, like it should have a lot of vegetables and not have any full-of-crap shortcuts (like condensed mushroom soup).


Chicken and Kale Stew

Olive oil
3 cloves garlic, minced
½ onion, chopped
1 lb chicken thighs or breasts, cut into bite size (about 1/2 - 1") cubes
8 ounces brown mushrooms, quartered if large
½ cup sun dried tomatoes
2 cups chicken broth
1 bunch kale, stems removed and cut in large pieces
¼ cup pitted Kalamata olives
1 15 oz can white beans, drained and rinsed under cold water
¼ cup lemon juice (about 1 lemon)
¼ cup (½ stick) cold butter, cut into 6 pieces

Coat a large sauté pan in olive oil (about a tablespoon) and heat over medium high heat.  When hot, add garlic and onions, sauté until onions are starting to brown.

Add chicken and sear until chicken is brown on one side.  Turn cubes, then add mushrooms.  Cook until the mushrooms are starting to release moisture, stirring occasionally.

Add the sundried tomatoes and broth.  Stir to loosen any brown bits in the pan.  Bring to a simmer, then add kale, olives and beans and stir until the kale softens into the liquid. Bring back to a simmer.

Add the lemon juice, then add cold butter one piece at a time stirring constantly until the butter is dissolved and the sauce is thickened.


Wednesday, May 9, 2012

Main Dish Salads


I love salads, and have big ones for lunch 3 or 4 days a week.  I don’t try to be Goldilocks, but have a few ideas about what a proper big salad should be:
  1. It needs to fill me up.  Even if I have been swimming. But I don’t want to be chewing on it all afternoon.
  2. The texture needs to be just right.
  3. They need to be tasty.
For me, a combination of protein, carbs and fat is best for filling me up.  So I include a high protein food, like some left-over chicken, grilled fish, or hard boiled eggs.   If I don’t happen to have any of those around, I might open a can of beans or fish (like salmon or sardines), or just add some nuts or cheese.   Beans do double duty as carbs.  I also like boiled potatoes or leftover brown rice.  But most often I just have some whole grain crackers (like Rye Crisp or Akwana) on the side.  My dressing always has some olive oil in it.  Nuts or cheese also do double duty to add some fatty filling goodness.  I also really, really like avocados in my salad.  This is the real reason I spent so much time in San Diego – a variety of avocados all year long, that have been properly handled so they get ripe before they rot!

The vegetables (and a sharp knife) are key to get a nice balance of crisp, crunchy, tender, and soft.  Hard raw vegetables, like carrots, and radishes give crunch – but should be thinly sliced so they are not too chewy.   I like cucumbers quartered, and in thick slices, so they don’t clump together. Some vegetables really need to be cooked before going into a salad, like broccoli, cauliflower, or beets. It’s a great way to use up dibs and dabs of things.    And lettuce should be in fork size pieces.   Soft (and creamy) can come from beans, potatoes, avocados, or cheese.. but not too much, otherwise you get glop.

I want something that punches up the flavor:  a few olives, or feta cheese.  A nice bit of roast chicken.  A bunch of great tomatoes. Some herbs.  Anchovies.  Left over cubes of roasted sweet potatoes.    Salads are a great way to use up leftovers, but don’t include everything that might be lurking in the fridge.  One or two proteins, one or two flavor punches, not more than 4 or 5 veggies.    Last, make sure it’s properly dressed.  Lately I have been guilty of just using lemon juice (generally a 1/3 to ½ a lemon), some olive oil, plus salt and pepper added directly to the salad.  When I don’t have lemons, I’ll make vinaigrette or for an occasional change of pace, a creamy dressing.   I have started not putting salt into the dressing – instead, just sprinkling a little salt on the lettuce just before dressing.  You can more easily tailor how much to use (not much salt is needed if you have feta cheese or anther salty ingredient).  And I think you get more salt flavor from less salt this way.   I also like my salads tossed so even with a little dressing, every bite is coated.  Then Goldilocks likes to put it on a plate and not just eat it from the bowl. 

Sunday, February 26, 2012

How to not follow a recipe


I’m notorious for not following recipes.  Even my own.   I can’t help but mess with things, even perfectly good things. Sometimes it works, others not.  I roasted a chicken last week... It was small and I was late getting it into the oven. So I figured why follow the recipe I posted a week or two ago?  I'll just cook on 400 convection for the whole time!  Needless to say, in 50 minutes I had an overcooked chicken.  But still, I’m always on the lookout for an easier way to do something, or figure out how to make something with what I happen to have on hand.  A good example is a beet salad I made for lunch a couple of Sunday’s ago.  

But first, let me digress.  I got a great book for Christmas, called Ideas in Food: Great Recipes and Why They Work.  It teaches you how to use all the cool toys in your kitchen, as well as chemistry behind certain foods and additives.  One of the cool ideas was to use your vacuum sealer for blanching vegetables.  The traditional method to blanch vegetables is to bring a large volume of salted water to boil, briefly cook (say 3-5 minutes for green beans), then remove the vegetable and put in an ice water bath.  Big pot + colander + big bowl = big mess.  Their idea is to put the vegetable in a vacuum bag, boil (using a pot that is just big enough) in bag, cool in ice bath.  The pot and bowl don’t really even get dirty, they just have water in them.  This hit me as a great way to cook beets for a salad, as the typical roasting process is messy and time consuming:  trim and scrub them, wrap in foil, roast in the oven for 45 minutes to an hour, cool, then peel and get beet juice everywhere.  They are quite tasty, but it takes a couple of hours.  I have tried peeling, quartering, and steaming in the microwave, but this makes a pink foam that escapes from the covered dish and gets all over.  You can also boil the beets, but it seems that you lose all the red goodness… especially if you drain and use an ice bath to quickly chill to use in a salad.     So… I quartered some small beets, lightly salted, put into a vacuum bag in a single layer, boiled in a covered pot just big enough to hold them for about 20 minutes, pulled out, ran under some cold water (since I was using right away I skipped the ice bath).  Beets ready to go into a salad in under a ½ hour!  And if you didn’t want to use them right away, not problem, they will keep for a few days sealed in the bag in the refrigerator!


So, back to the main story: How to Not Follow a Recipe.   I have a perfectly good recipe for beet salad, adopted from a recipe from a White House chef.  But it called for roasting the beets, plus fresh herbs I didn’t have, and feta cheese that I didn’t have.  And raw onions, which always seem to sharp in a salad.  First were the processes changes:  boil-in-bag beets (huge time saver) and the onions got a brief ice water soak to take out some of the bite.  I changed up the ingredients too:  used just lemon juice (I have lots of lemons) instead of lemon juice and vinegar.  If I didn’t have lemons, I would have used just the white wine vinegar.  I used the herbs that I happened to have on hand:  fresh mint, skipped the the parsley and cilantro (I would recommend having at least the mint or cilantro, they both have a strong flavor).  I did use the dried oregano it called for (one of the few dry herbs I keep around), but thyme or Italian seasoning would would too, and the cumin, a spice that pairs well with beets, but something I don't normally think of.   I used Romaine lettuce instead of spinach (its what I had on hand, pretty much any green would work), and goat cheese instead of feta (again, its what I had…  and pretty much my go-to cheeses for any salad are goat or feta). And I changed the ratio of beets to greens to make a main dish salad instead of a side salad.  The result?  A pretty good Sunday lunch.  Had I stuck to the recipe, I wouldn’t  have done it.  Was it as good?  Maybe not quite, but certainly better than just another PB&J sandwich!  


Main Dish Beet Salad

Serves 2.  

½ pound beets (any kind), peeled and cut into bite size pieces
½ red onion thinly sliced
3 tablespoons extra virgin olive oil
3 tablespoon fresh lemon juice or white wine vinegar
1 small clove garlic, minced
1 tablespoon (each) chopped mint and / or cilantro leaves
1 teaspoon dried oregano, thyme, or Italian seasoning (or 1 T fresh)
1 teaspoon ground cumin
¼ cup kalamata black olives
Salt and freshly ground black pepper
4 cups romaine or spinach, shredded
1/3 cup crumbled goat or feta cheese

1. Bring a medium pot of water to boil.  Lightly salt the beets.  Place in a single layer in vacuum bag and seal.  Place in boiling water (the bag will puff up), cover the pot if you want.  Turn bag over after 10 minutes or so.  After 20 minutes, the beets should be cooked.

2. Remove the beets from the pot, and run under cold water.  If desired, put into ice bath.

3. While the beets are cooking, put the onion in a small bowl with a few ice cube and fill with cool water.
  
4. Mix oil, vinegar or lemon juice, garlic, herbs, and cumin into a large bowl and stir together.  Drain the onions and add to the bowl along with olives and beets.  Toss.  Add the greens and toss again.

5. To serve, divide the beet salad onto 2 plates and sprinkle the servings with equal amounts of goat or feta cheese.

Friday, January 13, 2012

Planning. Kind of.


It’s the beginning of the year, full of all sorts of resolutions to lose weight and eat better. And plenty of advice.  One common theme is planning your meals, which generally start “once a week, make a plan, shop with a list, blah, blah, blah.”  This worked great for my family when I was a kid.  We lived 30 miles from a real grocery store.  There were no farmers markets. Our weekly schedule was pretty routine (not to say I had a boring childhood).   Also when I was a kid, we didn’t have 20 or 30 places between work or school (or sports) begging you with big neon lights to stop and get something tasty to eat.  No McDonalds. No Olive Garden. No Starbucks. 

But this doesn’t work for me now: shopping at the local at the farmers market (plus 2 or 3 other stores to get what I want) plus travel schedules that aren’t predictable. A big lunch out and you’re not hungry or you swam 2500 meters and you’re starving. Not to mention an aversion to actually sitting down and making a plan!   

But that doesn’t mean you give into the neon lights.  You can eat better and cheaper at home AND tailor it to what is happening that day.  It takes a little work, yes, but possible.  Here is what works for me: 

1. Plan to not plan: Keep a reasonably stocked pantry. This does not mean be prepared for the big one.  It means keeping some dry grains and pasta on hand. Onions and garlic.  Eggs.  Meat products in the freezer (small portions, vacuum packed).  A few cans of beans and tuna. Some bread or tortillas. A chunk of cheese or two.   From this (and a few fresh vegetables) there are an infinite number of possibilities. 

2. Plan your day:   I don’t try to envision Thursday’s dinner on Sunday, but to try to think of dinner by lunch time on Thursday. Plan parts of the day: When I worked in an office, I took my lunch (and this was resulted in the first 5 pounds I lost). It means knowing some 5 minute options when you get home hungry at 7pm. On Saturday, don’t leave the house at 11am to run 3 hours of errands without eating lunch first.   

3. Keep everyone involved.  There are 3 parts to meals at home: shopping, cooking, cleaning.   Share the tasks. If at lunch you decide roast chicken would be great for dinner, also decide who it’s most convenient for to stop at the market and pick one up. (As a side note, I have learned large pieces of meat languish in my freezer, as I seem incapable of remembering 2 days ahead to let thaw).  I’m convinced the toughest part of “cooking for one” isn’t cooking.  It’s having to shop plus clean in addition to cooking. 

4. Get a routine.  I like to make pizza, and it’s a great way to use up bits and pieces of cheese, or an odd vegetable.   But I need to get blob (my starter) out first thing in the morning.  So we are in the habit of having pizza on Friday.  Back in my Intel days, we used to have fish or steaks on Fridays… It was the one day I didn’t have meetings with Asia (at 5pm), so I would stop at AJ’s (local upscale grocery) and buy something that looked good to throw on the grill, plus maybe a vegetable if I didn’t have anything left from the previous weekend.  Yeah, and a bottle of wine. 

5. Plan for leftovers. One trick to getting meals on the table quickly it to start with food that was already cooked.  Grilled chicken and leftover rice (plus cheese and a tomato or cabbage and hot sauce) can become a burrito.  Flake leftover fish, add some chopped onions, celery, dill add a bit of olive oil and a squeeze of lemon juice for a sandwich.  Use leftover pasta to make a frittata.  It can mean popping what you had a night or two ago into the microwave.  Learn what you like leftover, learn what you can freeze.  And learn what you don’t:   I can’t explain why, but we don’t like leftover stir fry.  I won’t reheat fish.  Steamed or sautéed broccoli gets nasty.   Soup and stews are about the best thing to reheat. Many are even better the next day.  Here is one of my recent favorites… it reheats well, and it freezes well (I put one serving in a 1 quart Ziploc baggie, press out the air and freeze.  To cook, I thaw a bit under hot water – at least enough to break it up, even better to leave in hot water for 10 minutes or so until thawed, put in the serving bowl and nuke until hot). 


Vegetable Bean Stew (with or without Sausage)

Make it soup by using more water or broth. 

1 lb beans (any kind).  Or lentils.
1-2 tablespoons olive oil.  
1-2 slices of bacon (optional, good if you don’t use sausage)
1 large onion, chopped
1 or 2 carrots, sliced (optional)
1 or 2 celery stalks, sliced.  If you have them. 
2 cloves of garlic
Pinch of red pepper flakes.  Or Chipotle flakes. Or more. Or Fresh chiles.
1 quart chicken broth (optional)

1 small butternut squash, peeled, seeded, cubed
1 package of cooked chicken sausage, sliced (optional)

1 bunch of greens (kale, mustard, chard), stalks removed, chopped (or baby spinach)

Herbs, lemon juice, salt, pepper, hot sauce to taste.

Rinse the beans in a colander, then put into a large pot and cover (by a couple of inches) with water.  They should soak at least 6 hours, but not more than 10 or so.  If you need to soak faster, bring the water to a boil then turn off the heat and let sit for an hour.  Drain and rinse the beans. Note: lentils don’t need to be soaked. 

In the same large pot, heat the oil.  Sauté the bacon if using.  Add onion, carrots, celery, garlic, chili.  When onions are translucent (5 minutes or so), add beans, broth, and another cup or 2 of water.  Or just use all water (5-6 cups).  Beans should be covered by a ½ inch or so.   Cook for 1 – 1 1/2 hours, or until just barely cooked (they should still have a little bite, but not crunch).  Lentils only need 20-30  minutes.  Add the squash and sausage. Add more water if it’s too thick.  If you don’t use sausage, add a good ½ teaspoon of salt.  Cook for another 20 minutes or so until the squash is done.   Add chopped greens.  Kale or mustard greens need to cook 5 to 10 minutes; baby spinach is done as soon as you have stirred it in.    Taste – add salt, maybe a squirt of lemon juice, herbs, some pepper, maybe some hot sauce as desired.    Sometimes I will serve with a dollop of yogurt (especially if meat-less), or some cheese.

Saturday, April 30, 2011

An Honest Relationship with Honest Food

I have never been on “a diet". I’m not good at just doing what someone else has thought up (which might explain why I work for myself now). My diet is what I eat every day, not something that I go “on”, like a pill. I don’t even have a good label … I’m not a vegetarian, or gluten-free, not a junk food addict, not a locavore, or limit myself to raw food. I have given up on finding a one word description, but I think this is catchy: “A healthy relationship with healthy food.” Maybe it will be the title for my first book! So, what does this mean?

A healthy relationship: This means that I care about it, that I put effort into making it good, that I have fun with my food. It means not doing sneaky things, like going to a McDonalds drive-through and hiding the evidence. Or eating a whole container of ice cream because I’m sad. Or just eating crap because I’m bored. It means paying attention, and honoring the food you eat. 

 Honest food: right now, this is my biggest challenge. Honest food is real food, not a collection of chemicals. Cheetos are a good example of a chemical collection, not food. Most any 7 year old can understand that. But what about a tomato at the grocery store? Grown in Florida with lots of fertilizer and pesticides, picked when green by (likely illegal) migrant workers, gassed before buying to make it red. It looks like food, but doesn’t really taste like much. How about beef? Where the majority of the weight of the animal is added at a feedlot, fed government-subsidized, Round-up resistant genetically modified corn? Plus plenty of antibiotics since cows really aren’t plumbed to eat corn. And maybe a salt and chemical solution shot into the meat to make it even more tender and “flavorful.” Is that honorable food? Where do you draw the line? It would be nice to have meat from animals that lived a happy, natural life and vegetables from your local organic farmer but that’s hard to do. For some, impossible. You need to decide where you will make trade-offs. In the next few blogs, I will go through some of my rationalizations on what is OK to eat, or not. Or not much. 

 But meanwhile, let’s talk about Kale. It’s good braised, and a great addition to beans or soup. It’s really good for you. Unfortunately, it makes this year’s “Dirty Dozen" for pesticides. Fortunately, it’s something that is widely available at farmers markets (in the winter in Arizona, and I suspect most of the year in San Diego, although it grows best in cool weather), so that’s where I normally get it, either from an organic farmer, or one that doesn’t use pesticides. Organic is usually available at Whole Foods. But since Kale is so good for you, even if you need to buy at the supermarket (where its unlikely they will have organic) – go for it. You don’t eat it every day. Wash it well. And here is a way to make kale into a tasty treat – really, you can eat this like popcorn! 

Kale Chips

Serves 2

You can use any kind or kale.  The best for this is the Tuscan Kale (dark long leaves), but the more typical green curly leaf is good too.
1 large bunch of Kale, washed and dry
Olive oil (~ 2 tablespoons)
Salt

Pre heat oven to 350F, use convection if you have it.  Cover 2 large sheet pans with parchment paper.
Remove the heavy center stem from the kale.  You can do with a  knife, but generally I just hold the stem in one hand, and pull the leaf off with the other.  For large leafs, tear in half or thirds.
Make a pile of kale leaves on each pan.  Add about a tablespoon of oil to each.  Mix well with your hands, so that eat leaf is nicely coated, then spread out evenly.  There should be a single layer.
Put the pans in the oven.  After about 8 or 10 minutes, toss the leaves, they should be limp and maybe starting to dry.  Cook for another 5 to 8 minutes, or until nicely crisp (a bit brown) but not too dark.   Remove from the oven, salt and toss.   Slide into a large bowl and enjoy!

Wednesday, August 18, 2010

Pasta with Sausage and Squash

I know its not winter (not even close in Phoenix) but we are starting to see butternut squash in the farmers market....

Pasta with Sausage and Squash

Adjust to your taste… this works well with pre-cooked chicken sausages, or with Italian turkey sausage. I have been getting some good sausage at the farmers market, but it’s not Italian. So I add some fennel seed and red pepper flakes. The original recipe did not call for any greens, but I really like it, and it looks good.

1 small winter squash, peeled and chopped into cubes

1 tablespoon olive oil
8 ounces Italian pork sausage
1 teaspoon rosemary, minced (optional)
1 small onion, minced
1 large clove garlic, minced
½ cup white wine
6 ounces baby spinach or other greens (chopped if large leaf)

½ pound pasta, such as penne

Parmesan cheese

Chop the vegetables, then you can start cooking everything at the same time..

Steam the squash in a covered bowl in the microwave. Use just a bit of water, takes 4 or 5 minutes (should be almost tender).

Start a large pot of water to boil for the pasta.

Heat a large skillet over medium, add the oil. Crumble the sausage in the pan, add rosemary (and other spices if using) and cook. When the sausage is mostly brown, add the onion and garlic.

When the water comes to a boil, throw in a good bit of salt, then add the pasta.

Add the wine to the skillet, and scrape any bits. Add the cooked squash (and cooking liquid). Turn the heat down.
Just before the pasta is done, add the spinach to the pan (if using kale or other studier green, add a bit earlier). Add the cooked pasta to the skillet and toss. Add some pasta water if it seems dry.

Serve with Parmesan cheese.

Sunday, February 22, 2009

And yet more ways to cook greens


Believe it or not, I’m not tired of eating greens even with 3 big bunches of greens ever week (last week it was arugula, spinach, and beet greens… plus romaine lettuce and baby lettuce mix).  There are just so many things to do with them. I am doing better on using the beet greens than the beets!
I love quiche, and used to make quiche the normal way with a pie dough crust, and then always put spinach in the eggs (aka Quiche Lorraine).  But pie dough (as wonderful as it is) has a lot of butter, which is not a big deal if you are eating a small sliver, but I like about a quarter of the pie for dinner (which, using my pie crust recipe, would be 1½ tablespoons of butter), which is why I tried this recipe.  I was a bit hesitant because it looks weird (flour and bread crumbs… no egg and just a bit of oil to hold it together?), I really did not think it would work, but I trust the recipe book I adopted it from...   The New Enchanted Broccoli Forest (Mollie Katzen's Classic Cooking). I have made it several times, and it’s always come out great (even the leftovers).
One last note – it’s easy to make the bread crumbs.  Use the crust and end pieces from whole wheat sandwich bread – let dry on the counter for a couple of days (break into chunks to make sure they are really dry) and put them in a plastic bag until you are ready to use (like in a month or two).  If you are really channeling your depression era grandmother, you will use the plastic bag the bread came it.  When ready to use, just crush them (a rolling pin while they are still in the bag works great).

EDIT: Better way to make bread crumbs:  cut bread (any kind, stale is fine) into chunks, and put into food processor.  Process in bursts until broken up into crumbs.  Place crumbs on parchment lined sheet pan, place into a low oven (275F, convection if you have it) until dry but not browned. Check every 10 minutes and toss the crumbs (I think it takes 20-30 minutes).  Store excess crumbs in the freezer.

Spinach Crusted Quiche

Crust part:
2 Tablespoons olive oil
¾ lb fresh spinach or other greens, finely minced
½ teaspoon salt
¾ cup flour
¾ cup dry bread crumbs
Fresh nutmeg
Heat oven to 375F.  Lightly oil a 9 – 10 inch pie or quiche pan.

Heat the olive oil in a large skillet.  Add the spinach and salt, saute over medium high heat until the spinach is limp.  Add a bit of water if it’s too dry.  Remove from heat and add remaining ingredients and mix well.
Pat into the oiled pie pan.  Use a fork at first, and then your fingers to mold the crust.

Prebake for 25 minutes.  No need to cool before adding filling.

Quiche Part:

Layer the following in the crust:

Cheese:  ¼  pound or a bit more (grated).  I like Swiss types, like Jarlsburg or Gruyere.

Meat (optional): ¼ lb or so of ham or prosciutto, or a bit of bacon, or leftover chicken.

Vegetables: 1 cup or bit more.  onions, mushrooms (need to sauté first), asparagus or broccoli (lightly steamed), and/or chopped red peppers, plus herbs as desired.

Custard: 3 eggs plus 1 cup milk (can use regular milk, half and half, unsweetened soy milk, low fat milk or a mix), whisked together.  Pour evenly over the filling.

Cook for 35 minutes or until firm. Cool for 10 minutes before slicing.  Can be served any temperature.

Monday, February 9, 2009

Greens, greens, and more greens


The CSA box continues to have lots of great greens.  This week included spinach (one that is very textured), chard, collard greens, and beets with nice greens.  Last week (pictured) was spinach, collard greens, kale, chard, and beets.   But we are getting through them. 

Last week’s spinach and beet greens went into pasta, along with the Italian turkey sausage, onions, and red peppers.  The chard was sauted (with garlic and red pepper flakes) and served with roasted chicken.

The kale (the whole head) was chopped and went into homemade chicken and noodle soup last Wednesday (using the bones from Sunday’s roasted chicken). 

Week before last there were scrambled eggs with mushrooms and spinach (and cheese).   We had not had my most favorite green, arugula, in a couple of weeks, but that I usually put into sandwiches or salads.
The plan for this week’s chard and beet greens will be to sauté with some garlic, then make a nest to bake some eggs in … I have seen this recipe in a couple of cookbooks, including one I got for Christmas: Olives and Oranges: Recipes and Flavor Secrets from Italy, Spain, Cyprus, and Beyond and Barbara Kingsolvers Animal, Vegetable, Miracle: A Year of Food Life (ok, not a real cookbook, but the recipes by her daughter were the best part of the book).

And tonight, I made the collard greens (both last weeks and this – we had company).  I had never cooked these before, so why not try out on guests?  The “traditional” way to cook is to simmer a LONG time (like an hour or more) with a large amount of smoked pork product.  Since the main dish for tonight was an oven-braised pork shoulder, I figured that was enough pork.  More research revealed that it was possible to cook like other greens – a quick sauté with onions / shallots / garlic / red pepper flakes and/or bacon.  I choose to cook with just sliced red onion. Start by warming a bit of olive oil, cook the onions until they start to soften, then add shredded collard greens, sauté until dry, then add a bit of water and cook for about 5 minutes.  I finished with a bit of sherry vinegar.  They were good, a bit more chewy than spinach, but not bitter or too astringent.

Here is another (real) recipe for sautéed greens plus additional idea’s from one of my favorite food blogs, 101 Cookbooks.  My eye doctor  is quite pleased.

Monday, January 19, 2009

I never knew Kale was so good!

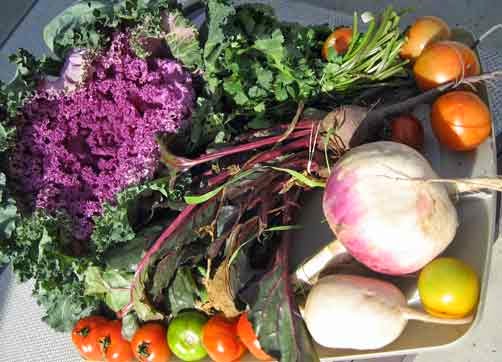
Here’s what I got this week in my CSA box from Love Grows Farms:

Kale, beets, one huge (and one normal size) turnips, tomatoes, cilantro, apples, and green onions  (although somehow the apples and green onions didn’t get into the picture). I love getting something new  like the kale;  the pink - purple leafy thing in thing on the left(although I am becoming dependent on good tomatoes every week).    One of my go-to sources on vegetable is Alice Waters  Chez Panisse Vegetables:  "Kale comes in a lot of shapes, sizes and colors, and is in the  mustard family ... (includes broccoli and cabbage) ...   It’s best after there has been some cold" (remember those frigid temperatures around Christmas where it ALMOST froze? ), anyways…  it was excellent!  I made this tonight, along with some Pasta Carbonara.  Surprise:  it keeps its color when cooked!   

Sautéed Kale with Garlic and Vinegar
1 Bunch of Kale
1 Tablespoon olive oil
Salt
1 clove garlic, smashed and chopped
1-2 teaspoons sherry or red wine vinegar
Cut the tough stems from the kale, coarsely chop, and wash in plenty of water.  Drain, but don’t spin dry.
Heat oil in a large sauté pan.  Add enough kale to cover the bottom of the pan.  Allow the greens to wilt a bit before adding more. When all the kale has been added, season with salt, stir in the garlic, and cover the pan.  The greens will take anywhere from just a few minute to 15 minutes to cook (mine took about 10 minutes over relatively low heat),  When they are tender, remove the lid and allow any excess water to cook away.  Turn off the heat and stir in the vinegar.  Serves 2-3 (original recipe was double this).


Other ideas for the week:
Roasted Turnips – peel, cube, toss with a bit of olive oil and roast in a hot (450F) oven. Expect they will take 20 minutes or so depending on cube size, finish with a bit of salt and pepper.
Beets (and cilantro) – I came across a recipe for a beet and carrot salad in one of my favorite food blogs, Zucchini and Chocolate and will try it this week.   The beets are used raw… seems like a lot less bother than roasting or steaming. [edit: not recommended!]
Beet and turnip greens – into some soup… either bean or lentil – vegetable.
Tomatoes, cilantro, green onions - sounds like a great start for salsa (luckily I have a chili pepper left from Crooked Sky Farms  from last week).

Green onions – have already gone into Pasta Carbonara (translation: pasta with bacon and eggs.  Let me know if you want the recipe.)

One of the challenges of getting all your vegetables once a week is to keep everything fresh the week or so until it’s used.   I try to do some work when I get home from the farmers market to keep everything fresh and to make it a bit easier to cook later in the week. 

Tender greens (lettuce, cilantro, arugula) get a wash and spin dry, then spread on paper towels. I pick out any bruised or otherwise undesirable leaves,  then place in a plastic bag (with the paper towels), and into the crisper.


Root vegetables that are dirty get a wash (sometimes outside if really dirty), left on the counter to dry, then into plastic bag and into the fridge. I also remove the tops from things like beets, turnips, and carrots.   I wash the greens, spin, and wrap.   Here are the beet and turnip greens from this week.
     Enjoy!