Vegetables Every Day

Vegetables Every Day
Carrot Tarator with Beets

Saturday, December 29, 2018

New Toy: Breville Pressure Cooker


Did you get a pressure cooker for Christmas?   I got one last year, and still have mixed feelings.   It is a pain to get out, set-up, and clean, but it does a few things very well:

1. Make broth.   You get broths that are full of gelatin in about 2 hours.
2. Braise meats, especially chuck roast for barbacoa or stew.  Also handy to cook up chicken legs.
3. Hard cook eggs, because they peel easy.   Every time.
4. Cook beans... just be aware there is a lot of variation in cooking time.
5. Cook grains, although I haven't played with this much. 

The biggest misconception about the pressure cookers is that they will get dinner on the table quickly.  Just because the cooking time for beans might be 10 minutes, that doesn't mean dinner will be on the table in a half hour.   To cook a pot (1 lb) of beans, it takes a 25 minutes or so to get up to pressure, 20 minutes to cook, then at least another 45 plus minutes to depressurize... all of the sudden, you are looking at an hour and a half, which is about how long it takes to cook beans on the stove.  The advantage is that its totally hands off cooking, no waiting for it to come to a boil, turning down to simmer and on my stove, getting frustrated because you can't maintain a slow simmer.  And sometimes you can depressurize more quickly, although this is not recommended for beans, or anything that might have a layer of fat on top (like braised meat).

One other thing I'm still working on is the cooking time.  Most recipes have cooking times that are just too long.    I have a Breville Fast-Slow Pro, not an Instapot like everyone else, I am guessing that it runs a bit higher pressure.  The good thing is the preset times are generally pretty good and help make a good guess to start, but beans are still a challenge.   The best reference I have found so far to cook beans is this page from Rancho Gordo...  it really gives you a feel on how different the times are for soaked vs. unsoaked, and for different varieties of beans.

I made this a couple of nights ago... and was really happy with the result.  Soaking the beans allows the beans to cook in the same time as the squash.  Seemed the perfect dish after all of the holiday meals. 


Winter Squash, Lima Bean and Kielbasa Soup (Firecooked)


This is a take on my beans and greens soup.  It comes out quite well in the pressure cooker, and this combination makes a very pretty soup.  If you don’t have a pressure cooker, it will cook just fine on the stove.


1 pound dry white lima beans

1 tablespoon olive oil 
1 large onion, chopped
2 carrots, sliced
2 cloves of garlic, minced
1 small butternut squash, peeled, seeded, cubed
12 ounces smoked kielbasa, sliced (about ½” slices)
Pinch of red pepper flakes
½ teaspoon salt, or to taste

1 quart chicken broth
2 cups water

1 bunch collard greens, de-stemmed and chopped

Rinse the beans in a colander, then put into a large pot and cover (by a couple of inches) with water.  I use the cooking pot to do the soaking as to not get another bowl dirty.  They should soak at least 6 hours, but not more than 10 or so.  Drain the beans when ready to start the soup. 

In a pressure cooker, heat the oil on the sauté Setting.  Add onion, carrots, garlic.  Add the squash and Kielbasa as you get them chopped.  Add a bit of salt (the sausage is usually quite salty, so you don’t need much more) and the red pepper flakes.   When onions are translucent add the drained beans, broth and water.  Beans should be covered by a ½ inch or so of liquid.   Set to pressure cook using the bean setting (high pressure) for 5 minutes, and natural release (total cooking time on my cooker is about 1 hour 15 minutes).*  Check to make sure the beans are done, and the salt level is ok. Cook longer if needed.  Add the chopped greens.  Put on sauté function to bring back to a boil, turn off and let the greens cook for about 5 minutes.    Serve with a bit of black pepper.


* If you don’t have a pressure cooker, just simmer on the stove.  Guessing it will take about 1 ½ hours.. start checking after the first hour. 


Friday, June 29, 2018

Banana Bread

We eat lots of bananas at our house, but even so, we sometimes get caught with too many, and I need to find a way to use them up.  And people that know me, understand that I occasionally end up with bananas that have flown an extra 1000 miles or so. 

The overripe bananas usually get used in Sunday morning muffins (which is another recipe I need to add to the blog). But I consider muffins something eaten before noon, not dessert.   For dessert, I make this. Still, it's not too sweet, and great for snacks, or to take sailing, or to a potluck.  


It's also easy to make.  "Easy" is a bit relative.  What might be easy for me, it more challenging for you.  But this is certainly easier to make than most desserts, and quicker to mix up than the muffins I normally make.  One of the things that makes this easy is mixing the wet ingredients with an immersion blender. (And if you don't have an immersion blender, you should get one). So one blender cup, one mixing bowl.  No food processor, or other tools or bowls to mash bananas. 


Another thing that makes a recipe easy is a recipe that uses ingredients I already have.  Face it, I didn't plan for too many bananas.  So I haven't planned for anything special for baking them (of course, I assume everyone has flour, baking powder, soda, and eggs...).  And these type of quick bread recipes are not too fussy.  It will still come out good even if you make a few substitutions to use up what you happen to have in the house.  For example, I made this at my mom's...  she didn't have any whole wheat flour, so I used all regular flour.  No plain vegetable oil, so I used olive oil.   No buttermilk, so I used Greek yogurt thinned with a bit of milk.  Don't like any of the cultured milks? Any milk-like substance (soy milk, etc) will work.  It might taste a little different, but it will be good.  It will come out fine without the vanilla extract. In fact, the recipe that I used for inspiration called for oats (which was fine, but I didn't really like the texture), and no add-ins (like chocolate chips or walnuts).   One last tip:  when the bananas hit that speckled ripe stage, toss them into the refrigerator (this would be before the overripe all brown stage).  The skins will get dark, but the bananas will still be good for making bread for another week or so. 


Banana Bread

2 cups flour (I like best with half white whole wheat and half all purpose)
2/3 cup sugar
1 1/2 teaspoons baking powder
1/4 teaspoon baking soda
1/4 teaspoon salt
1/2 teaspoon cinnamon
------------------------------------
2 medium ripe bananas cut into quarters
2 eggs
1/3 cup buttermilk or plain yogurt*
1/4 cup vegetable oil (or olive oil)
1 teaspoon vanilla extract
-------------------------------------
½ cup chocolate chips

* If Greek yogurt, use a couple of spoonful’s of yogurt plus milk to make 1/3 cup.

Preheat oven to 350F.   Grease and flour a loaf pan.

Put the dry ingredients in a medium mixing bowl and stir to mix.

Put banana, eggs, milk/yogurt, oil, and extract in mixing cup of immersion blender, or in 1 quart measuring glass measuring cup.  Blend until mostly smooth  (don’t over blend, you don’t want a lot of air mixed in). 

Pour wet into dry, stir a bit, add the chocolate chips, finish mixing together.  Don’t stir too much.   Scrape batter into the prepared loaf pan. 

Bake for 55 – 60 minutes, until nicely brown and skewer comes out clean (you can also check with a thermometer, looking for 195 -200F)  .  Run a knife around the edge, and then turn onto cooling rack.   Let cool at least 10 minutes before slicing (an hour is better).   Once cooled, wrap loaf and store in refrigerator. 


And this is of one of my recent platters...  colored porcelain inlaid on dark stoneware.  


Sunday, June 17, 2018

Meatballs with Mushroom Gravy

As promised, more ways to use old bread.

This is one of the meals that I used to cook with my mom growing up.  We ate a lot of hamburger.  There was a rotation that included spaghetti with meat sauce, chili mac, taco's, sloppy joes, and hamburgers for normal weeknight dinners.   Weekends might include pork chops or fried chicken, or occasionally steaks. Once in while a pot of stew, chili, or beans and ham hocks.  Duck and other game birds were also eaten weekly through the fall and winter, and fresh fish when someone caught some trout or bass.  There was always a vegetable to go with, and potatoes if not pasta.  We ate very well, most everything from scratch, with a few helpers like a can of soup (but never ever Hamburger Helper!).  From those days, I still have the habit of cooking dinner, at home, most nights.  And once in a while, I still want one of those hamburger based dinners.

In the path to eating less CRAP, I have cut out most of the shortcuts, like cream of something soup. Generally, the cream, the something, maybe some onions and broth will pretty much replace any of these. But I have done things that do make life a bit easier, like baking the meatballs.

Before and after baking the meatballs


The bread is considered a "stretcher" to make the meat go further, but they are also key to getting the right texture.  I use fresh bread to make this, but you can substitute about a 1/2 cup of dry breadcrumbs, plus an extra tablespoon of milk.  

But the big change is making the mushroom sauce from scratch, not starting with a can of cream of mushroom soup.  It is certainly more work, but not really hard.  And so much better.   

One last note....  If you make this with the full recipe, and plenty of noodles, it will feed 4.  For just the 2 us, I just use half the meatballs (and freeze the other half).  I generally make something green to go with (above with some roasted asparagus).  I make a few less noodles, but all the gravy (I like it saucy).  It feeds both of us and enough left for a lunch.  

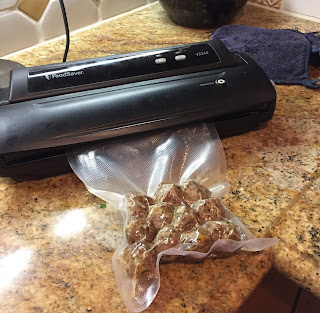
You can also freeze all the meatballs for a total do-ahead weeknight dinner.


Meatballs with Mushrooms

Meatballs: 

1 egg1 cup (about 1 slice) fresh bread crumbs or cubes
½ of a small onion, minced
2 tablespoons milk 
½ teaspoon Worcestershire or fish sauce
2 tablespoons fresh parsley (or 2 teaspoons dry)
½ teaspoon salt
¼ teaspoon pepper
1 pound ground beef
2 tablespoons grated parmesan cheese

Preheat oven to 400F (convection if you have it).  Prepare a sheet pan with parchment paper. 

In medium sized bowl, lightly beat egg.  Add the bread, onion, milk, and seasonings.  Stir and let bread get mushy.  Add beef and cheese, gently mix together (hands work best).  Make golf ball sized meatballs and place on prepared sheet pan.   Bake for 15 – 20 minutes, turning balls after 10 minutes.  They are done when brown and cooked through. 

Once the meatballs are in the oven, you can start the mushroom gravy and pasta.  Or, the meatballs can be done ahead and refrigerated or frozen.    

NOTE:   for just the two of us, I just use half the meatballs (and freeze the other half).   I make the same amount of pasta and gravy.  

Mushroom gravy:

8 ounces sliced mushrooms
½ of a small onion, diced
½ teaspoon salt
¼ cup flour
¼ cup white wine (optional)
1 cup chicken broth
1 cup milk (preferably whole milk)
Salt, pepper to taste
Parsley or other herb for garnish

6 – 8 ounces egg noodles  

Heat oil or butter in large skillet, add mushrooms and onions, add salt. Place pot of salted water on to boil for noodles.  Sauté the mushrooms until they have released their moisture.  Sprinkle the flour over the mushrooms, stir and cook until flour is absorbed.  Add white wine, stir and let cook down, then add broth and stir well (if using cold meatballs, add now). Bring to a simmer.  Cook the noodles. Let the gravy simmer until the noodles are almost done, then add milk and warm meatballs.   When the noodles are done, drain and add to the meatballs and gravy.  Stir to mix, then taste, add salt and pepper as needed.  Sprinkle with herbs and serve.


Leftover meatballs, heated with a handful of kale and Bread Crumb Topping.

Monday, May 21, 2018

Bread Crumbs and What to do with them!


A new study about food waste came out this week, claiming that the typical American wastes about a pound of food per day.  And that the worst offenders were healthy eaters, because fruits and vegetables comprise 39% of the wasted food  (followed by dairy and meat).  What surprised me was that bread was not on this list.  I know I do better than most on using up fruits and vegetables, I have a lot of strategies ranging to buying really fresh product at the farmers market, to sweep-the-veggie-drawer recipes, like Pasta Whatever and Quesadilla's... just check the "Random Vegetable" link.   But it seems that I'm constantly tossing bread that is moldy or stale.  I know its in part because I buy bread that isn't loaded with preservatives, but the reality is that we just don't eat enough sandwiches or toast to go through a full loaf in a week or so. Or you get (or make) a nice "artisan loaf" to go with soup, and its stale the next day.    I do toss bread into the fridge after a few days, and it's still good for toast, but after about 10 days it's stale even for toast (and likely starting to mold).

So....  I have been trying a few new things.  First has been to get more proactive about making dry bread crumbs, which keep for a long time in the freezer.  But of course, this doesn't help unless you actually use the bread crumbs from the freezer.  I have a couple of recipes  that use bread crumbs, like Spinach Crusted Quiche, and meatballs (and hopefully will get around to posting that recipe).  But I needed more outlets for bread crumbs, because storing crumbs in the freezer for a year and then throwing out is not reducing waste.  I have managed to stumble across a few of recipes that use a lot of crumbs (by stumble, I mean I found one, then googled and found another 100 similar recipes, then pulled together the way that seemed best to me).  The first is a Bread Crumb Topping that you put on pasta or salads. This is something that really elevates a ho-hum salad or leftover pasta. The next is Oven-fried Zucchini.  Way back (we are talking about my college days) many people "discovered" that they liked zucchini when it was breaded and fried.  I will admit these are not quite the same, but they are quite tasty and actually pretty good for you.    How do you use bread crumbs?

First, let's cover making bread crumbs. You can use any kind; white, French, whole wheat, whole grain, seeded, etc., but I don’t like to use bread that is on the sweet side (> 2 grams sugar per slice according to the nutrition label), like a honey wheat or most of the whole grain breads.  Sugar will cause the crumbs to brown faster, which might be a problem in some recipes.  Plus I'm just not a fan of sweet tasting bread (and yes, I'm the crazy lady looking at the label of every loaf in the store).

Bread Crumbs

Leftover bread, preferably stale, torn into chunks.  Sandwich bread is fine as long as its not sweet.

Oven: 300F, convection if you have it.    Place parchment paper on a sheet pan (or pans, depending on how much leftover bread you have).

Place 1 - 2 inch chunks of bread into the bowl of a food processor, filling up to about half to three quarters full.  Pulse until broken up, go with longer pulses until the bread is in crumbs.    Put crumbs on prepared sheet pan.  Repeat if you have more bread.   Keep the crumb layer to less than a ½ inch.

Place pan in preheated oven.  Toss after about 10 minutes.  Then check every 5 minutes… goal is dry crumbs, not toasted crumbs.  It generally takes 15 - 25 minutes. Let cool completely.   If the crumbs are a bit big for what you want, give them another twirl in the food processor. Use dry crumbs within a few days, or put into freezer zip-lock bag and freeze, they are good for many months (at some point, they get that freezer taste).


Bread Crumb Topping

Good on pasta or salads.  But they don’t keep.  Use within an hour or so of making. This makes enough for 2 servings, double or triple as needed.  My inspiration for this recipe is from Melissa Clark of the NYTimes... that one uses anchovies.  Probably delicious, but haven't yet tried that!

2 tablespoons olive oil
2 cloves garlic, minced
Pinch of red pepper flakes
½ cup dried bread crumbs
2 tablespoons fresh herbs (such as parsley, thyme, oregano) or 1 teaspoon dry Italian herbs
Optional:  1 tablespoon finely chopped preserved lemon or olives
Salt and freshly ground pepper

Warm olive oil over medium heat in small skillet.  Add garlic and red peppers, stir, then add remaining ingredients.   Cook for a few minutes, stirring frequently until the crumbs are golden.  Add lots of pepper, and maybe salt (if you are using preserved lemons or salty olives, you probably don’t need more salt).


Breaded Zucchini

Serves 4 … but 2 people can finish this off if they are hungry.

Zucchini – about 8 small or 4 medium or 2 large, ends trimmed
1 cup dry bread crumbs
1/3 cup grated parmesan cheese
1 teaspoon Italian herbs
Good grind of pepper
1 jumbo or 2 large eggs
2 tablespoons olive oil
Salt

Preheat oven to 425F, use convection bake if you have it.   Line a sheet pan with parchment paper. 

If zucchini are small, just quarter (and maybe cut the quarters in half if you have long skinny zucchini.  If you have larger zucchini, cut into ½ inch slices. 

Mix the bread crumbs, parmesan cheese, herbs and pepper in a shallow dish.   Beat the egg(s) in shallow bowl 

Dip each piece of zucchini in the beaten egg, then drop into the crumbs.  Press crumbs on all sides.  This goes a bit easier if you have one “wet” hand for the egg dip, and one “dry” hand for the crumbs.  Place each coated piece on the prepared sheet pan.   Drizzle the coated pieces with the olive oil.  

Bake for 20 – 30 minutes, until brown and crispy.   No need to turn!  Sprinkle with salt when they come out of the oven.  Serve immediately with ranch or bleu cheese dressing, or marinara sauce.


Ranch Dressing

1 small clove garlic, minced
1 tablespoon lemon juice
¼ cup mayonnaise
¼ cup plain yogurt or buttermilk
     Or use Greek yogurt and less mayonnaise
1 teaspoon dill or other fresh herbs
Few drops of soy sauce
1 – 2 drops of hot sauce
Salt and pepper

Place the garlic and lemon juice in a small bowl while you get the rest of the ingredients together… this helps tame the raw garlic.   Whisk everything together.  Chill until ready to use.  Keeps for a few days.