Vegetables Every Day

Vegetables Every Day
Carrot Tarator with Beets
Showing posts with label Beans. Show all posts

Wednesday, March 22, 2023

Lentil Stew


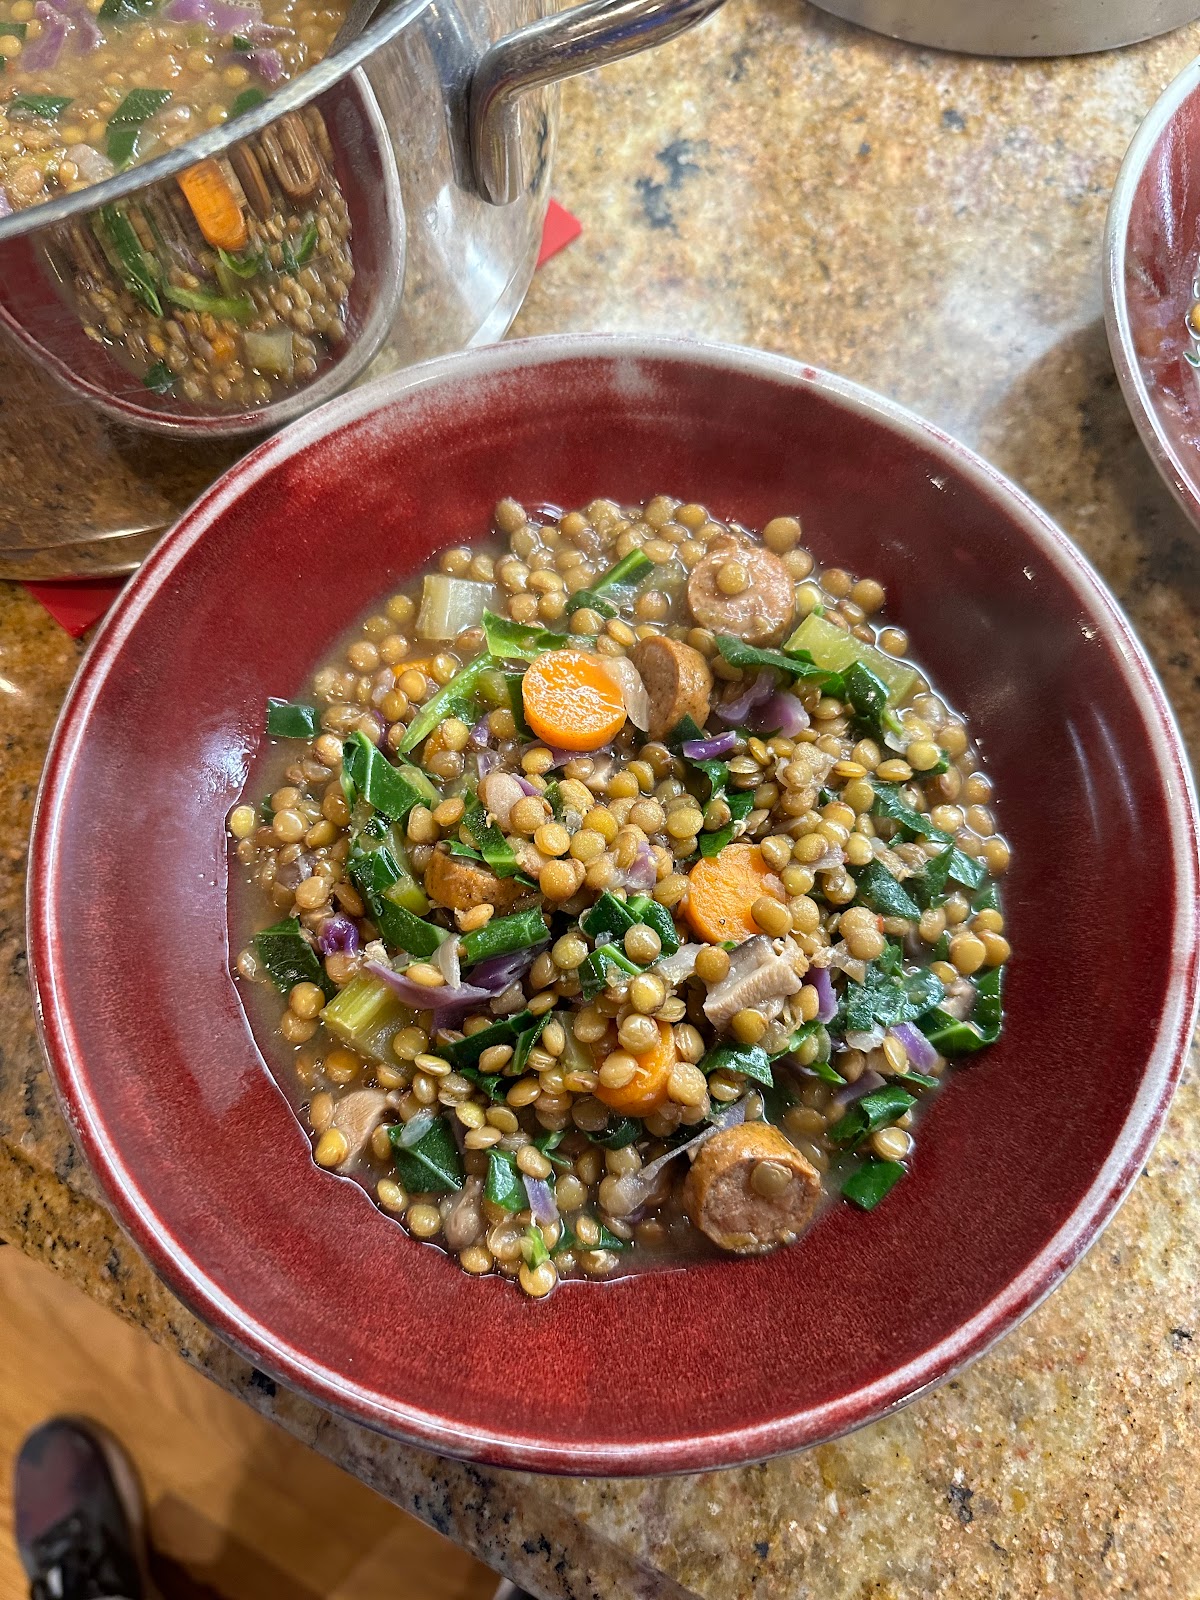
The last post I did was for a bean stew... since then there have been 12 atmospheric rivers dumping a record amount of rain in California.  So I am still making bean stews!  This is an update of a winter squash and bean stew that I do with lentils.  Lentils have all the wonderful protein packed benefits of beans, but they cook much faster: 20 - 30 minutes.  Plus they grow with much less irrigation than other crops like wheat and corn. I'm sure we will sometime soon find that important again. And while I love winter squash in stews, they are gone from the markets, but this works well with pretty much any vegetables you have around.  I added mushrooms and cabbage to this soup along with extra carrots. Plus as always a bunch of greens - in this case I used collard greens which I love in soups.  

 
Rosemary and Bay from the front yard

Don't hesitate to add plenty of red pepper, or some hot sauce at the end. Yesterday's batch was a bit under seasoned - I added a nice spoonful of salsa which gave it a nice kick.  

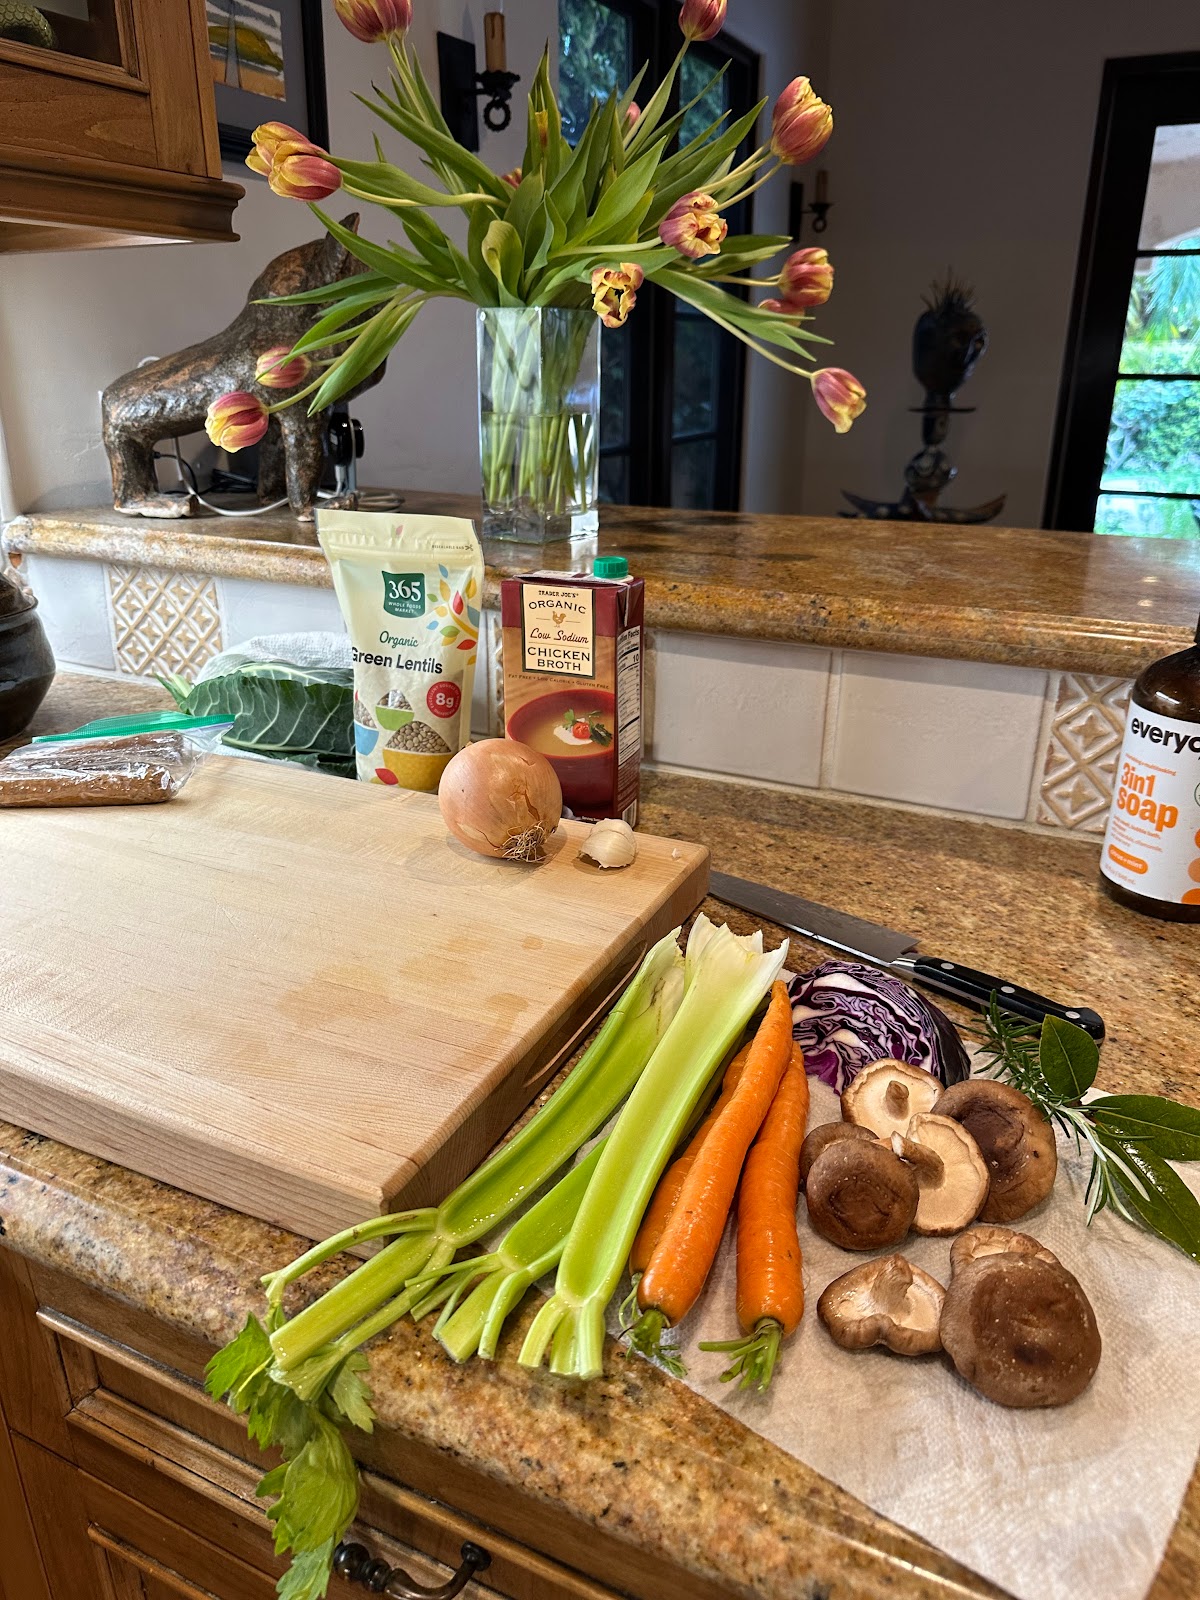
Here's what went into yesterday's batch: 
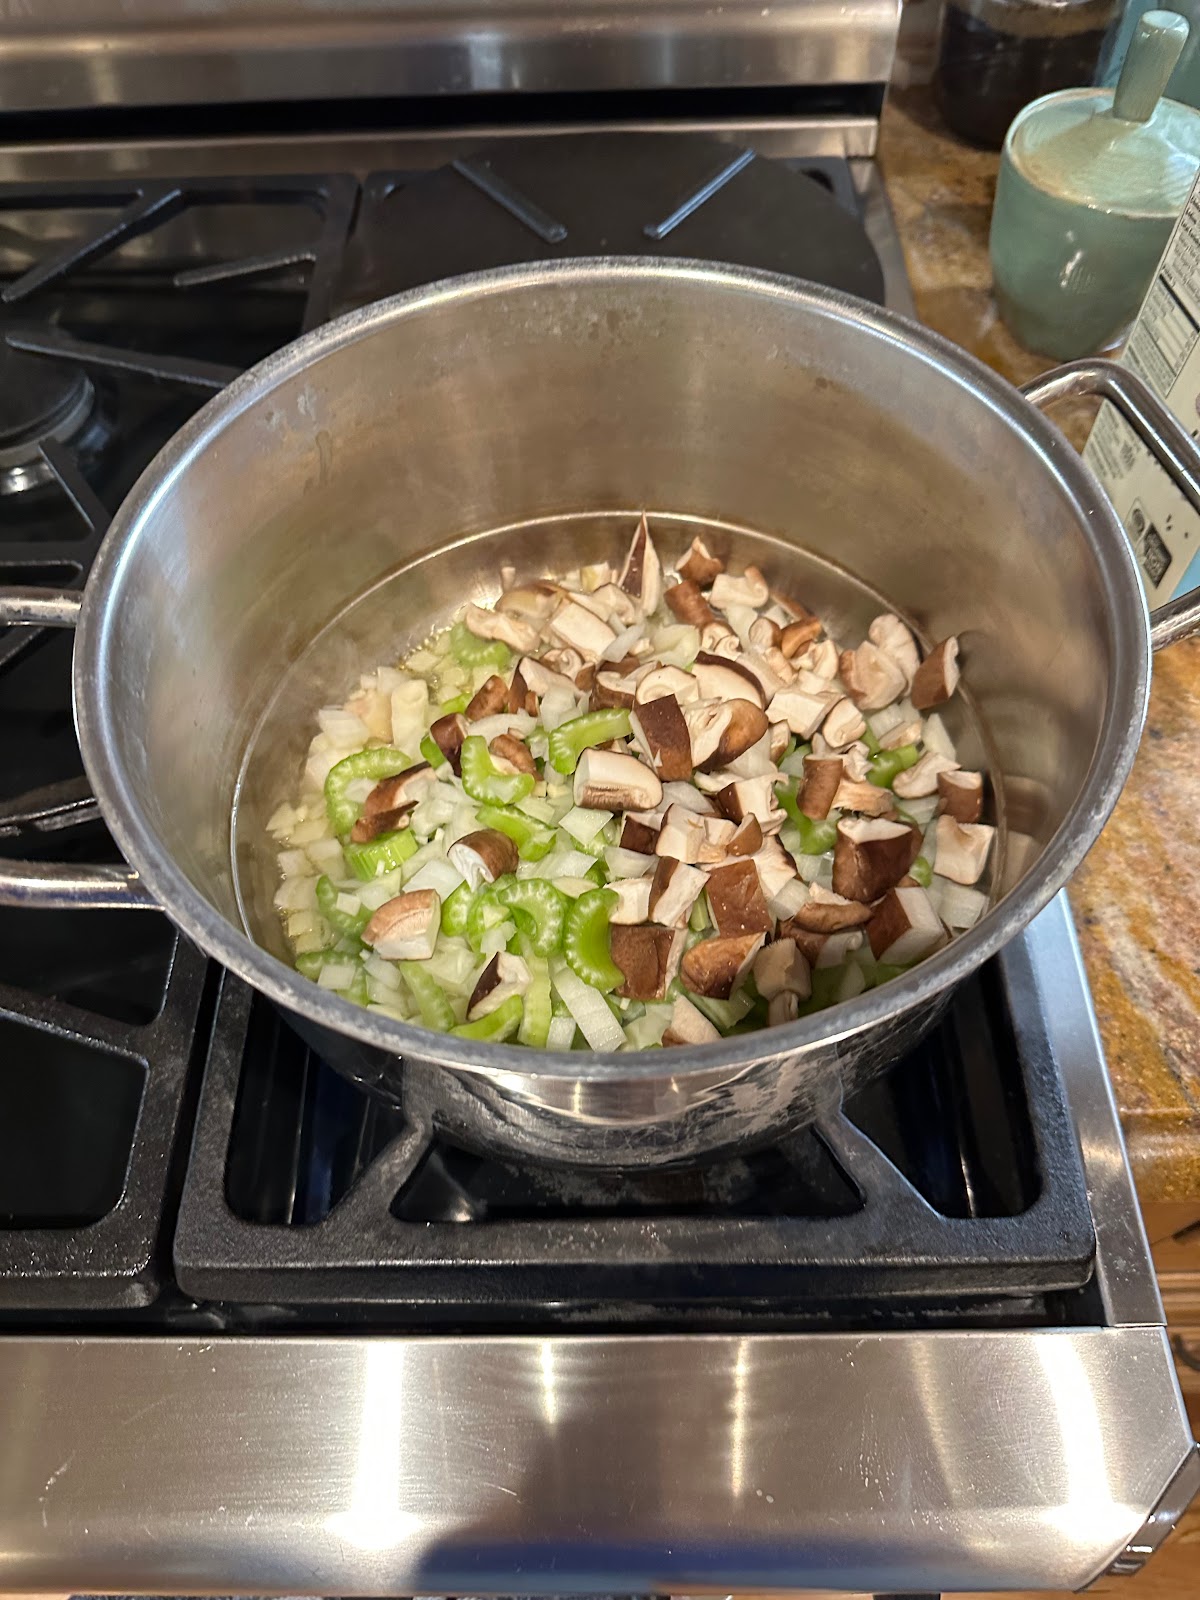

Chop and saute: 


Cook .. Just 30 minutes!

Add greens (chop first): 


And its done!


 The recipe: 

Vegetable and Lentil Stew with Sausage

This can be a clean the crisper drawer kind of soup, with any kind a vegetable


1-2 tablespoons olive oil 

1-2 slices of bacon (optional, good if you don’t use sausage)

2-3 links of pre-cooked chicken sausage (or use pork sausage – sauté instead of bacon)

1 large onion, chopped

1 to 4 carrots, sliced 

1 or 2 celery stalks, sliced (optional)

2 cloves of garlic

Red pepper flakes to taste

Rosemary (1-2 teaspoons fresh), bay leaves (2-3), and/or Italian Seasoning

More veggies as desired: mushrooms, cubed butternut squash or sweet potato, green beans, tomatoes

6 cups of liquid - 1 quart chicken broth plus 2 cups water (or all water or all broth)

1 pound of green lentils, rinsed 


1 bunch of greens (kale, mustard, chard), stalks removed, chopped (or baby spinach)


Herbs, lemon juice, salt, pepper, hot sauce to taste.


In a large pot, heat the oil.  Sauté the bacon if using.  Add onion, sausage, celery, garlic, chili (plus any veggies that would benefit from sautéing like mushrooms), plus salt to taste (I start with a ½ teaspoon).  When onions are translucent (5 minutes or so), add carrots and other vegetables, rinsed lentils, broth / water and bring to a simmer.  Cook for 25 or 30 minutes, until lentils are tender (don’t cook to the point of falling apart).  Add more water if desired. Add chopped greens.  Kale or mustard greens need to cook 5 to 10 minutes; baby spinach is done as soon as you have stirred it in. Taste – add salt, maybe a squirt of lemon juice, herbs, some pepper, maybe some hot sauce as desired. 

Monday, December 5, 2022

Lamb Stew with Chickpeas and Butternut Squash

Happy Holidays!


Ready or not, the holidays are here! Its been a busy year for me: 

Lots of time in Arizona with family and friends


 a wonderful vacation to Italy (including a week long clay workshop),


enjoying life in San Diego,


continuing as an arts commissioner for the city (this year I am the public art chair), 


plus enough time in the studio to fill the kiln. It's ready to do my first bisque fire of the year - just need to resolve a problem with the plug (which I wished I noticed a year ago when I last fired the kiln), but still hopeful I will get the glaze fire done before Christmas. What I haven't done all year is any food blogging. So here is a recipe that is perfect for the cooler weather.

Lamb Stew with Chickpeas and Butternut Squash

 This recipe was inspired by a NYT recipe which used canned chickpeas and no pressure cooker. Soaking the chickpeas is essential so they cook in about the same time as the meat, I have also adjusted the spices and added more broth to cook the beans. I also do a “shake” to coat with the spiced flour to keep from getting a bowl dirty… so I haven’t made everything harder to do!

5 or 6 servings, takes about 1 hour 45 minutes (not counting soaking time)


8 ounces dry chickpeas
 
1 teaspoon ground cumin
1 teaspoon ground coriander  
½ teaspoon turmeric
¼ teaspoon freshly ground pepper
1/8 teaspoon cayenne pepper
1 teaspoon salt
¼ cup flour
1 pound lamb stewing meat, trimmed and cut into 1-inch cubes
1 tablespoon vegetable oil
 
1 onion, diced
2 large cloves garlic, minced
1 quart low-sodium chicken broth
 
~ 2 pounds butternut squash, peeled, seeded, and cut into 3/4-inch cubes
 
Chopped fresh cilantro for garnish
 
About 8 hours prior to cooking the stew, rinse and soak the chickpeas. I use the strainer and cook pot to do this.  The water should cover the beans by a couple of inches, and I salt the water with a teaspoon or so of salt. When ready to start cooking, drain the water and dry the pot.
 
Combine the spices and salt in a bowl. In a large baggie, mix 1/4 cup flour and 1 1/2 teaspoons of the spice mixture, add the lamb and shake to coat. Set the cooker to “sear” and heat the oil. Put about one half the lamb pieces into brown, turning once. Remove and repeat with other half of lamb pieces, adding more oil if needed.  Remove the lamb and set aside. Add the onion and garlic to the pot, along with any remaining flour in the baggie. Cook for a couple of minutes. Add the chicken broth, stir up any stuck bits. Add the lamb, remaining spice mixture, and soaked chickpeas. Pressure cook using the “chili and stew” setting for 20 minutes (10.5psi, quick pressure release).   When complete, add the squash then use “vegetable” setting for 4 minutes (7.5psi, pulse pressure release).  Serve topped with cilantro.

Tuesday, March 16, 2021

Trying new things ... My store is open!

My ceramics store is finally opened, and I have even made a few sales... but there are still many things available.  I am calling it Firecooked Ceramics.  I also have a new Firecooked Ceramics Facebook page, along with my Firecooked Instagram feed. It's been a learning experience, I am using a web platform called Shopify which sets up to take credit cards, manage inventory, and provides a discount on shipping.  And for all my loyal followers (and because I am still trying to figure out what I should charge, here is a discount code for 20% off that is good for the rest of March:  GRANDOPENING )


Now a year in on the pandemic, with hope on the horizon that soon we can all gather and travel and go out to eat, I am making a list of things that have changed for the better ... I'm thinking on-line grocery shopping, the ability to do meetings on Zoom when you need to, and what is better cooked at home. 

One of the things I have added to my cooking repretare is corn tortillas. I love tacos (who doesn't?) but didn't cook them at at home that often.  It's hard to get good corn tortillas at the grocery store, then they would typically sit in the fridge a few days before I used them, at which point they were less good.  Plus I would always have leftover tortillas that I didn't use that would get tossed.  But when you make your own, you can make just as many as you need, and nothing beats a freshly cooked tortilla. Early in the pandemic, when we couldn't get basics like bread and pasta and beans, I discovered not one but two bags of masa harina (corn flour) in my pantry. You see, I have a recipe for empanadas that called for a 1/4 cup of masa .. that I have made twice.  And the second time that I made them, I couldn't find the bag of masa I thought I had (turns out it was buried in the freezer) so that's how I ended up with two bags. And while in March and April last year basic food items were hard to get, I could buy a tortilla press on Amazon and have it in 2 days.  I just followed the recipe on the bag, and got amazing tortilla's.  

Some special equipment is needed... The above mentioned tortilla press, plus some type of a griddle. I use my cooking steel (a large heavy sheet of steel that I usually cook pizza on in the oven), but you could also use any kind of griddle, or a traditional comal, which is a low sided cast iron pan. 


To make the dough, you just mix the masa with a bit a salt and warm water.  You want the dough to be springy, and neither too sticky or too dry. You let the dough sit for an hour or so, then divide and make small balls (how small depends on how big you want your tacos.. I like them on the smaller size, and make 8 tortillas from 1 cup of masa. To get even sized balls, I cut the big ball in half, then each half into quarters. 


For the filling, you can put in anything you like, including fish or chicken but lately I have been doing veggie tacos. I have nice nearby to-go options for meat loaded tacos, so rarely make those. I use either cauliflower or zucchini as the main veg, plus black beans, onion, garlic, and peppers (if I don't have fresh chili's I just use chili flakes or chili powder).  I am going to give you a recipe, but don't worry about following it too closely. 

I get everything ready (including the add-ons), then cook the tortillas, then the filling.  Both are pretty quick. 


The last part of great tacos at home is the add-ons...  I like something crunchy like radishes or shredded cabbage, something creamy like greek yogurt or sour cream, maybe something cheesy .. cotija is great but I usually don't have that, feta or cheddar are my typical go-to's, bonus points for avocado and cilantro.  Plus hot sauce and lime.  


Corn Tortillas


Scale to make as many as you like, this makes 8 small (5 inch diameter) tortillas, which feeds 2 of us. Water hot from the tap is warm enough, although rather than wait for the water to heat up I usually just warm the water in the microwave. 


1 cup of masa harina

½ teaspoon salt

¾ to 1 cup of hot water


In a medium bowl, mix the masa and salt, then slowly add the water as you mix (I usually just use a fork to do this, would opt for a wooden spoon if I was making a bigger batch).  As the dough starts to come together, knead with your hand several times.  If it is too dry and cracks, add a bit more water.  If it is sticky, add a bit more masa.  It should feel a bit springy when you are done.   Roll into a ball (leave in the same bowl), cover and let sit for an hour or so.  Whe ready to make the tortillas, heat up the griddle.  You are aiming for about 450F, a medium high heat that water droplets will “dance” on.  Divide the dough into 8 pieces (can do more or less depending on how big you like your tortillas).  I cut the ball in half, then in quarters to get even sized pieces, then roll each piece into a ball (they are about golf ball sized).   Place a cut open plastic baggie in the tortilla press (I think the weight that works best is the ziplock storage bag thickness).  Put a ball of dough between the sheets of plastic, then press.  Cook tortilla on the hot griddle for 30 seconds to a minute on each side.  Transfer to a plate lined with a towel, keep wrapped in the towel as you finish cooking all the tortillas.  Serve warm. 

Veggie Taco’s


This makes about 2+ servings.. Please use this as a guideline and feel free to improvise.  Leftovers are good in a quesadilla, on a baked potato, or in a salad. 


Olive or vegetable oil

Cauliflower or zucchini, about 3 cups. Cut in small pieces (about ¼ inch)

Onion, about 1 small, diced

Garlic, a couple of cloves, minced

Bell pepper, about ½, diced (optional)

Hot Peppers, diced (optional, to taste..)

Black beans, about 1 can, drained and rinsed

Cumin, about 1 teaspoon

Chili powder or chili flakes, to taste, ¼ to 1 teaspoon

Salt, pepper


Garnish (pick at least 2-3):

Greek yogurt or sour cream

Shredded lettuce or cabbage, maybe mixed with cilantro

Avocado. Radish slices. Cheese. 

Salsa. Hot sauce. Lime wedges


Warm corn tortillas (3-4 per person)


Heat thin layer of oil in large sauté pan over medium hot flame.  Add cauliflower or zucchini, let sear on one side.  Add the rest of the veggies, let cook a bit, then add bean and spices. Stir well and let beans heat through.  Make tacos with warm tortillas and desired toppings.


Friday, October 30, 2020

Pressure Cooker: Black Bean and Chorizo Soup


It seems like fall is here all of the sudden.  Nights are cool, complaints coming from east coast relatives about it being cold and it's almost Halloween! The latest meal I have been making regularly is a Black Bean and Chorizo soup.  I might even be making it more often than Curried Lentils.  I make in it in a Breville Pressure cooker, which is similar to an Instapot.  From recipes I see on the web, I am guessing the Breville cooks at a slightly higher pressure, as most things will cook faster than called for in a Instapot.  In my opinion, this is the biggest challenges to using a pressure cooker is figuring out the cook time.  Soaked beans will cook much faster (5-6 minutes for soaked black beans vs 22 minutes for unsoaked), fresh beans cook faster than old beans, and different pressure for different cookers.  But you can always just cook some more if you need (and use the quick release, as the natural release is what takes the most time in this recipe). Also ... this is just a version of my Vegetable Bean and Sausage Stew, which is cooked on the stove... On the stove, I would recommend soaking the beans first, and it probably would cook in about the same total time (my guess is the soaked beans would need to cook for an hour or a bit more on the stove at a gentle simmer).  


I like a lot of greens in my soups... this is just one bunch from the Marcella's Farm stall at the Coronado Farmers Market.  You could use a lot less if you want.


When I made this batch, I found I only had a 1/2 pound of black beans in the panty, so I mixed in a 1/2 pound of pinto beans.  The soup is normally darker brown. 


Black Bean and Chorizo Soup

Makes 5-6 servings

1-2 tablespoons olive oil
6 ounces Mexican chorizo sausage
1 large onion, chopped
1 or 2 carrots, sliced
1 or 2 celery stalks, sliced (if you have them around)
2 cloves of garlic
1 jalapeno chili, or some chili flakes
1 pound black beans, rinsed   (pinto beans also work)
6 cups water
Salt (about ½ - 1 teaspoon) and  freshly ground pepper
 
1 bunch of greens (kale, mustard, chard), stalks removed, chopped (or baby spinach)

Garnish:  Sour cream or Greek yogurt, cilantro, avocado, chili slices, fresh corn, grated or crumbled cheese

 In the pressure cooker, heat the oil (using Sear setting).  Slice the chorizo if it is in a casing, or make little balls if not, and cook in the hot oil until brown.  Add onion, carrots, celery, garlic, chili.  When onions are translucent (5 minutes or so), add beans, water, salt and pepper.   Pressure cook using the “bean” function (high pressure) for 22 minutes (note – may be longer with an Instapot).  Let pressure reduce naturally.  When done, taste the beans and make sure they are cooked (if not, cook under pressure for a few more minutes, and OK to manually release the pressure).  Also taste for salt and add more if needed. Turn cooker to slow cook, high setting.  Add chopped greens.  Kale or mustard greens need to cook about 5 minutes; baby spinach is done as soon as you have stirred it in.   

 Serve with a garnish or two. Freezes well.

Wednesday, September 2, 2020

Lemony Pasta with Chickpeas

Pasta is on the rotation for dinner at our house about once a week.  Most the time its some variation of Pasta Whatever (looking back at this post, it's one that I should update!), tonight it's going to be Mac and Cheese, sometimes it's premade Tortoni's from Trader Joes. Another thing that has been on the weekly rotation is a batch of beans cooked in the pressure cooker.  Often its Beans and Greens with Sausage (pretty much follow this recipe, using unsoaked beans and cook for 20 - 22 minutes using the bean setting on the cooker), sometimes I just cook plain beans like black beans or chickpeas that go into other things, like tacos or queso's, salads, humous, etc.  Looking for a way to use up some freshly cooked chickpeas, I discovered a new recipe that is getting made at least once a month.   I found it on a google search (chickpea pasta) on a fun blog called It is 2020 and We Are Food Blogging, Baby, traced in back to a recipe on the New York times cooking app, and pretty much follow the recipe as far as ingredients, but change up a couple of things to make it easier.  


Here's what my workspace looks like.  I'm following the recipe on my iPad.  When making something for the first time, I usually get everything out before I start.  Since this is something that comes together quickly, its something I will continue to do (if there are gaps in the cooking, I generally will get things out as I need them).


Ok, maybe I staged this photo a little...

A couple of things make this pasta different that my normal.  One is adding chickpeas (which is an Italian tradition), but you also mash some of the chickpeas to thicken the sauce.  You are also using parsley as a green, a whole bunch is used.  Although I haven't tried it, I think this would be good with any green like spinach if you didn't have parsley on hand. The other things that give this pasta flavors that are different than my typical flavor palette is adding rosemary (which comes from one of the big bushes in my yard) and butter. Adding butter to make things better should not be a surprise, why have I never done this?

One change to the NYT's recipe is to use a potato masher to mash the beans in the skillet ... no need for another bowl!  The other is to transfer the pasta directly from the pasta pot to the skillet using a large slotted spoon.  This keeps from getting a colander dirty, plus I don't accidently forget to save some of the pasta water for the sauce at the end.  

Lemony Pasta With Chickpeas and Parsley

8 ounces penne other short, sturdy pasta
2 cups cooked chickpeas, home-cooked or canned
¼ cup extra-virgin olive oil
2 garlic cloves, smashed and peeled
½ onion, diced
1 tablespoon finely chopped fresh rosemary leaves
 Pinch of red pepper flakes, plus more as needed
1 ½ cups chickpea cooking liquid (if canned, just use water)
3 cups fresh parsley leaves (from 1 large bunch)
⅔ cup grated Parmigiano-Reggiano, plus more for serving
1 tablespoon butter
 Finely grated zest of 1/2 lemon
 Salt and Ground black pepper to taste

Put a large pot of water on to boil for the pasta, then immediately start the sauce. 

For the sauce, heat oil in a 12-inch skillet over medium heat. Saute garlic until just starting to brown, about 2 minutes. Stir in onions, rosemary, red pepper flakes and a pinch of salt. Cook, stirring occasionally, until onions are soft, about 5 minutes.

When the water boils add the pasta. 

Just after starting the pasta to cook, add the chickpeas to the onions, and use a potato masher to lightly mash them; they should be about half-crushed.  Then add the cooking liquid or water. Bring to a simmer and cook gently until most of the liquid has evaporated, about 5 minutes.  Turn the heat down or off if the pasta is not done yet.

When the pasta is slightly underdone, transfer the pasta to the sauce using a slotted spoon (alternately, save a cup of the pasta water and drain the pasta with a colander).  Add parsley, and cook (turn the heat back up to medium if you turned it down) until the pasta has finished cooking and is coated in the sauce, 1 to 2 minutes, adding pasta water to get a nice sauce (typically I will add a 1/2 cup or so).  Quickly toss in cheese, butter, lemon zest and black pepper.  Taste and add more salt if needed. Divide into bowls, and sprinkle with additional cheese to garnish.


Monday, April 13, 2020

Quarantine Eating

So what have you been cooking for the pandemic?  It's clear that I gravitate to the kitchen and cooking for stress relief, but not sure that's it a net benefit considering how stressful grocery shopping has been.  Seeing empty shelves is kind of scary (on top of the risk of being out in public).  Plus we have been getting a good portion of our food delivered, mostly though Amazon Fresh, which is frustrating trying to find things in stock and getting delivery slots. But I have filled my freezer with plenty of soups and stews "just in case" and doing a better job that normal at using up all of the things in the corner of the pantry and bottom of the freezer. 

I am grateful for so many things ... so far my friends and family are all healthy, we have a nice house, live someplace where we can get out for walks and runs, great neighbors, technology that lets us get together virtually.    Now if it would just stop raining!

Some of what I have been cooking ... some new recipes and some old: 

 A new recipe, Pasta with Chickpeas  from Melissa Clark at the NYT cooking.

This one is destined to become a favorite.  I pretty much followed the recipe, although I only had a half bunch of parsley.  I did use fresh cooked chickpeas ... my neighbor had a couple of pounds in the back of her pantry that were "at least" a couple of years old and was unsure how to cook, so I volunteered to cook in my pressure cooker...  I soaked them for 12 hours and cooked for 12 minutes in the pressure cooker and they were great. I'm grateful for great neighbors! Of course I haven't seen dry chickpeas in the stores, but the local store here is starting to get canned ones again.


I also found a tart crust recipe I like. What's great about this is that you can just bake off one small tart and save the dough for later. I have not tried the filling in this recipe, the filling was a freezer discovery, some lemon curd that I made year, topped with some Greek yogurt and chocolate chips. I sometimes make things and put them into the freezer for a rainy day.  We had over 3 1/2 inches of rain last week, so that counts as a rainy day! 

I have been getting what are essentially CSA boxes from my favorite farmer at the Farmers market.. including lots of beets.   


My try at Pickled Beets was successful.
There have been lots of meals with green incorporated in them...


Like Curried Lentils (this is with beet greens). I was able to get lentils last week at the local store, and this recipe will work with green lentils too, its just not as pretty. And Spinach Swiss Chard Crusted Quiche with Fennel and Sausage.  In a stroke of genius, I oven roasted the fennel, onion, and sausage in the filling on a sheet pan (at the same time as cooking the crust) .. one less skillet to wash and less total time.  

And we have not had to sacrifice our lunch salads..   And in case you think every meal is all healthy and green like this, the salad is incorporating some left-over take-out fried chicken from a local restaurant (doing our part to support local business...).
There are also lots of meals with wheat and cheese ... 


Like pizza (I have been experimenting with a no-knead crust) and Macaroni and Cheese.


Also in the comfort food category was Meatloaf.    And the mini-loaf I froze came out great.  I thawed in a bowl of cold water (took about an hour), then it needed to bake for about 45 minutes. 

Plus some simple dinners, like a loaded baked sweet potato and the quesadillas  pictured with the beets. 

And the normal...Foil Grilled Fish, (using up some fish a neighbor gave us last fall)  Stir fry,  and "Whatever" Pasta
  
I've also been experimenting with no-knead bread ... but that's another post.   Stay well, and let me know how you are doing!