Vegetables Every Day

Vegetables Every Day
Carrot Tarator with Beets
Showing posts with label #ReduceWaste. Show all posts

Wednesday, March 22, 2023

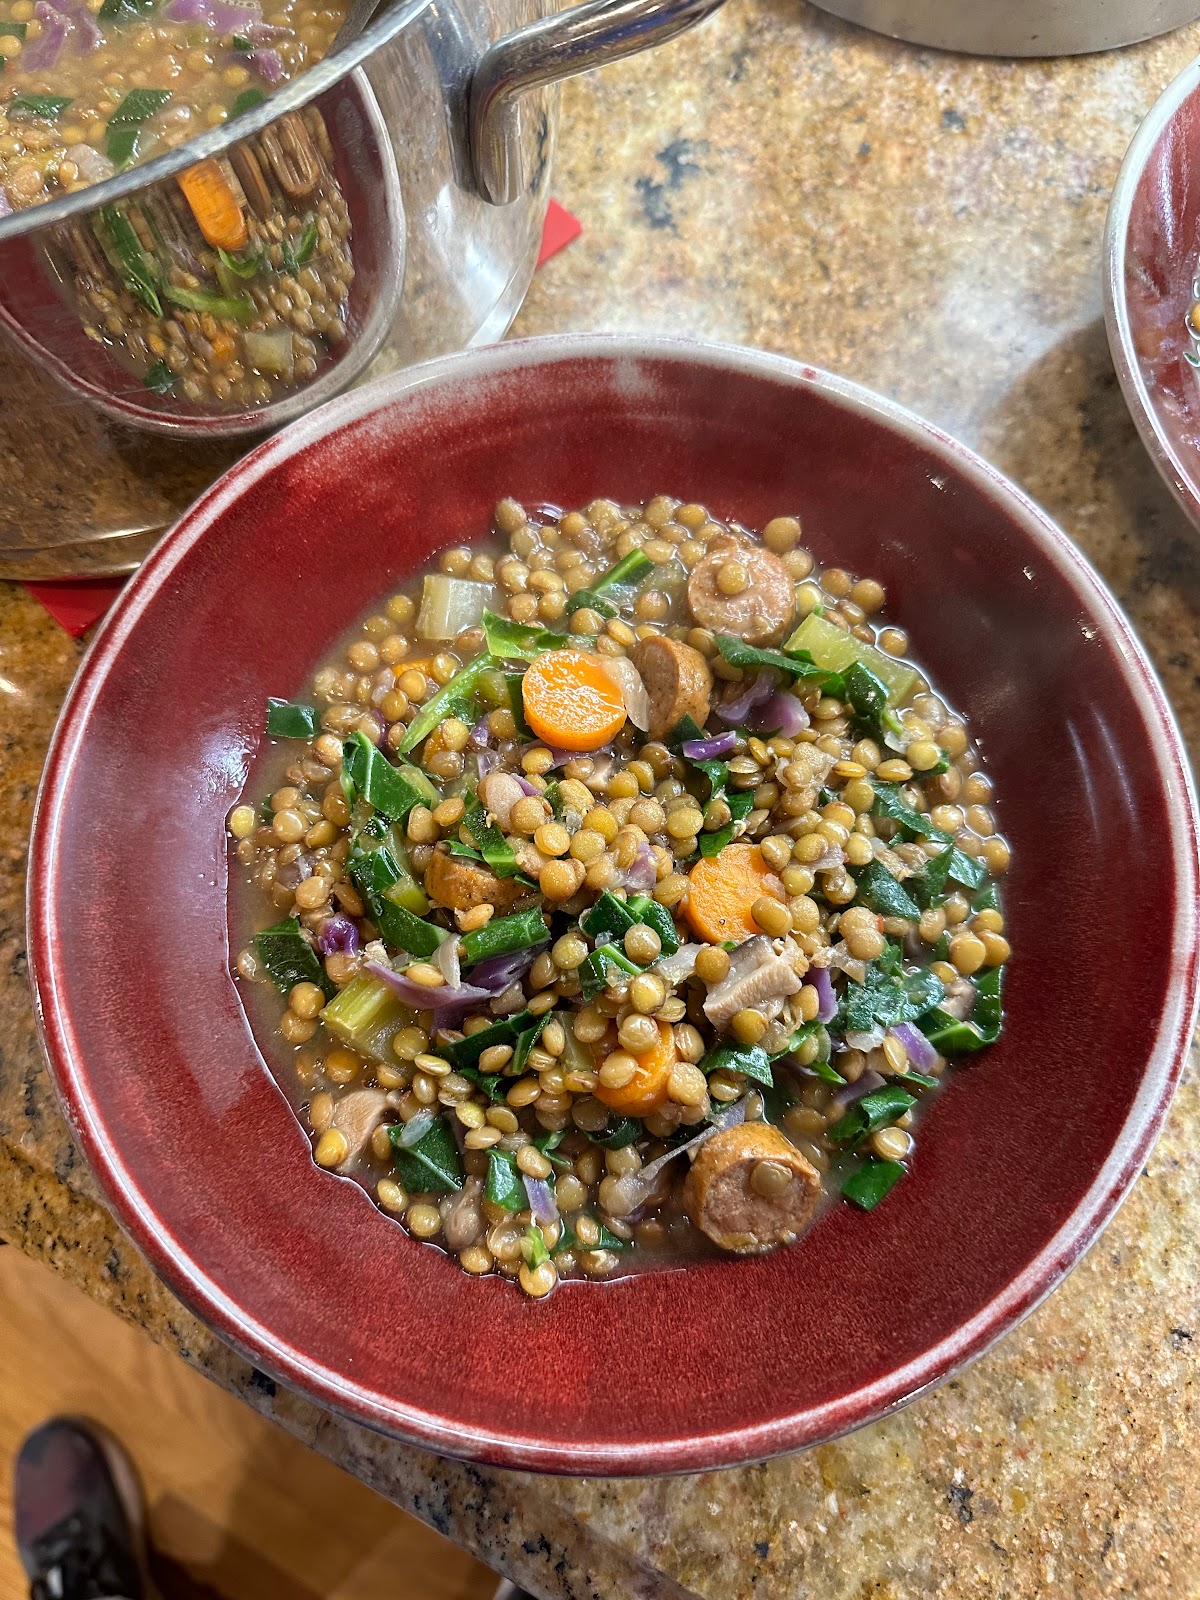
Lentil Stew


The last post I did was for a bean stew... since then there have been 12 atmospheric rivers dumping a record amount of rain in California.  So I am still making bean stews!  This is an update of a winter squash and bean stew that I do with lentils.  Lentils have all the wonderful protein packed benefits of beans, but they cook much faster: 20 - 30 minutes.  Plus they grow with much less irrigation than other crops like wheat and corn. I'm sure we will sometime soon find that important again. And while I love winter squash in stews, they are gone from the markets, but this works well with pretty much any vegetables you have around.  I added mushrooms and cabbage to this soup along with extra carrots. Plus as always a bunch of greens - in this case I used collard greens which I love in soups.  

 
Rosemary and Bay from the front yard

Don't hesitate to add plenty of red pepper, or some hot sauce at the end. Yesterday's batch was a bit under seasoned - I added a nice spoonful of salsa which gave it a nice kick.  

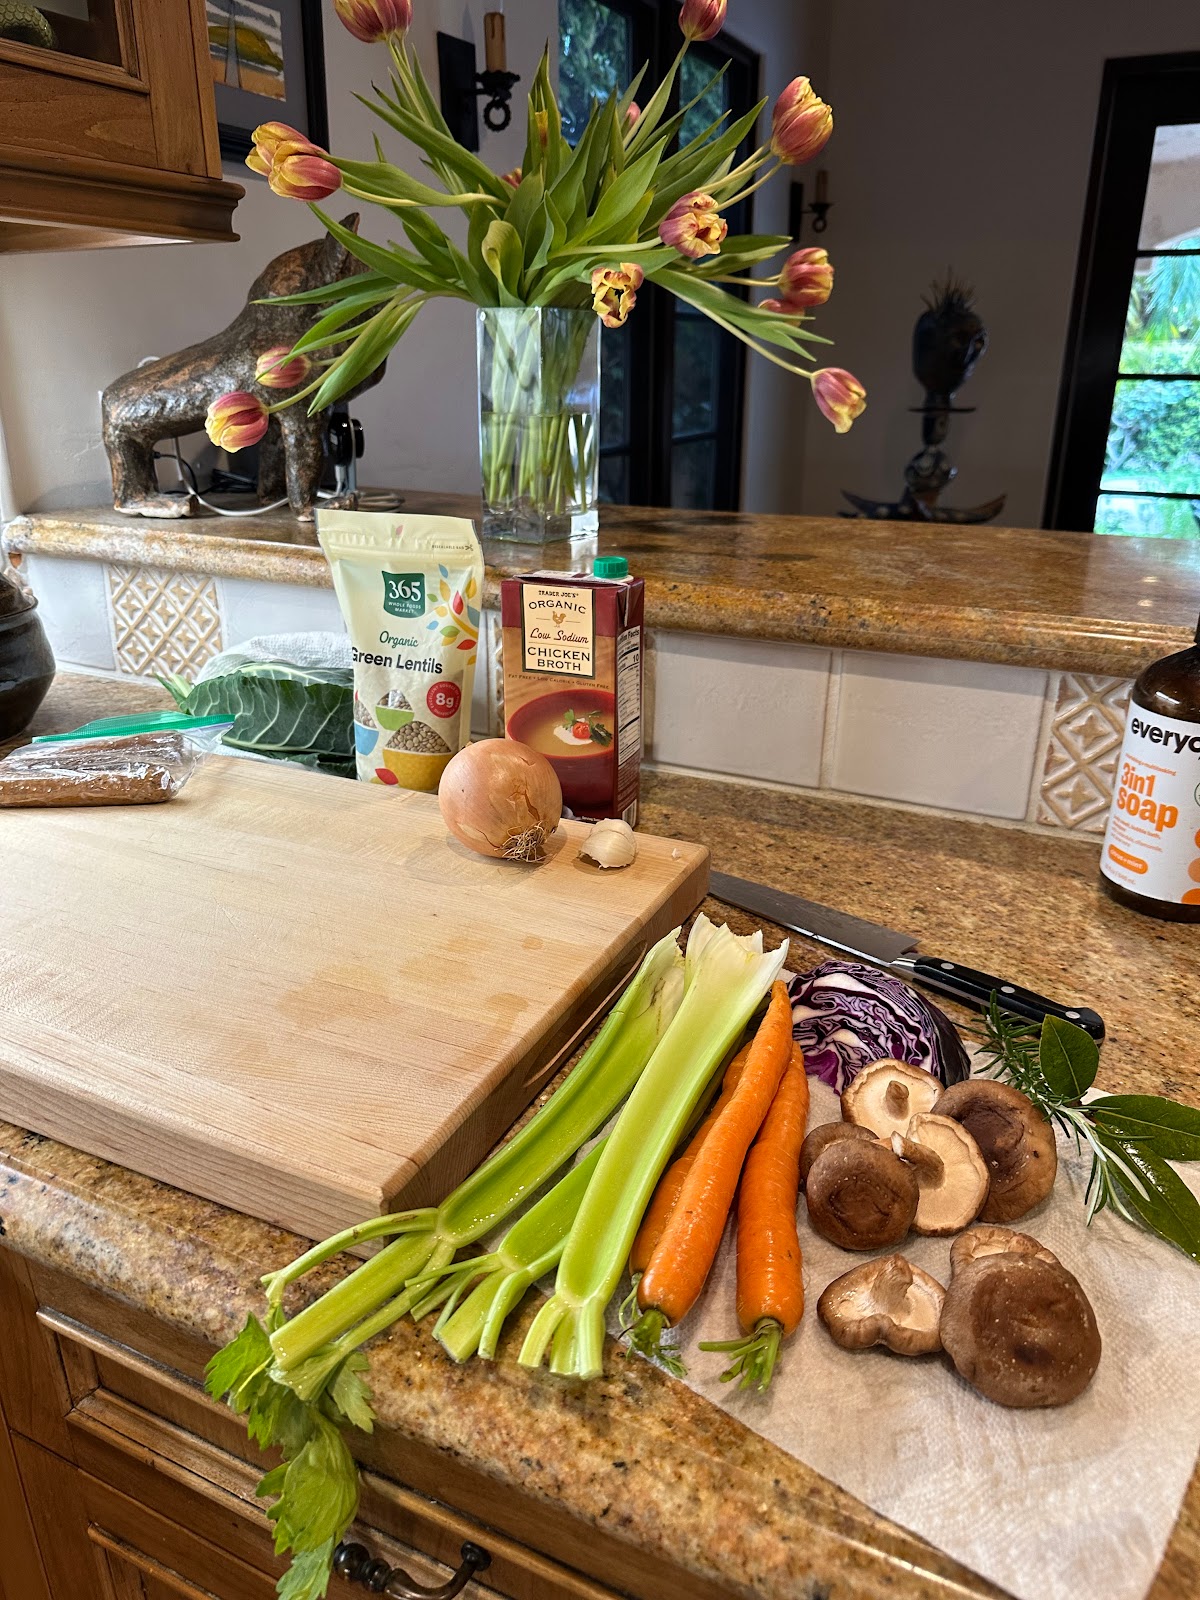
Here's what went into yesterday's batch: 


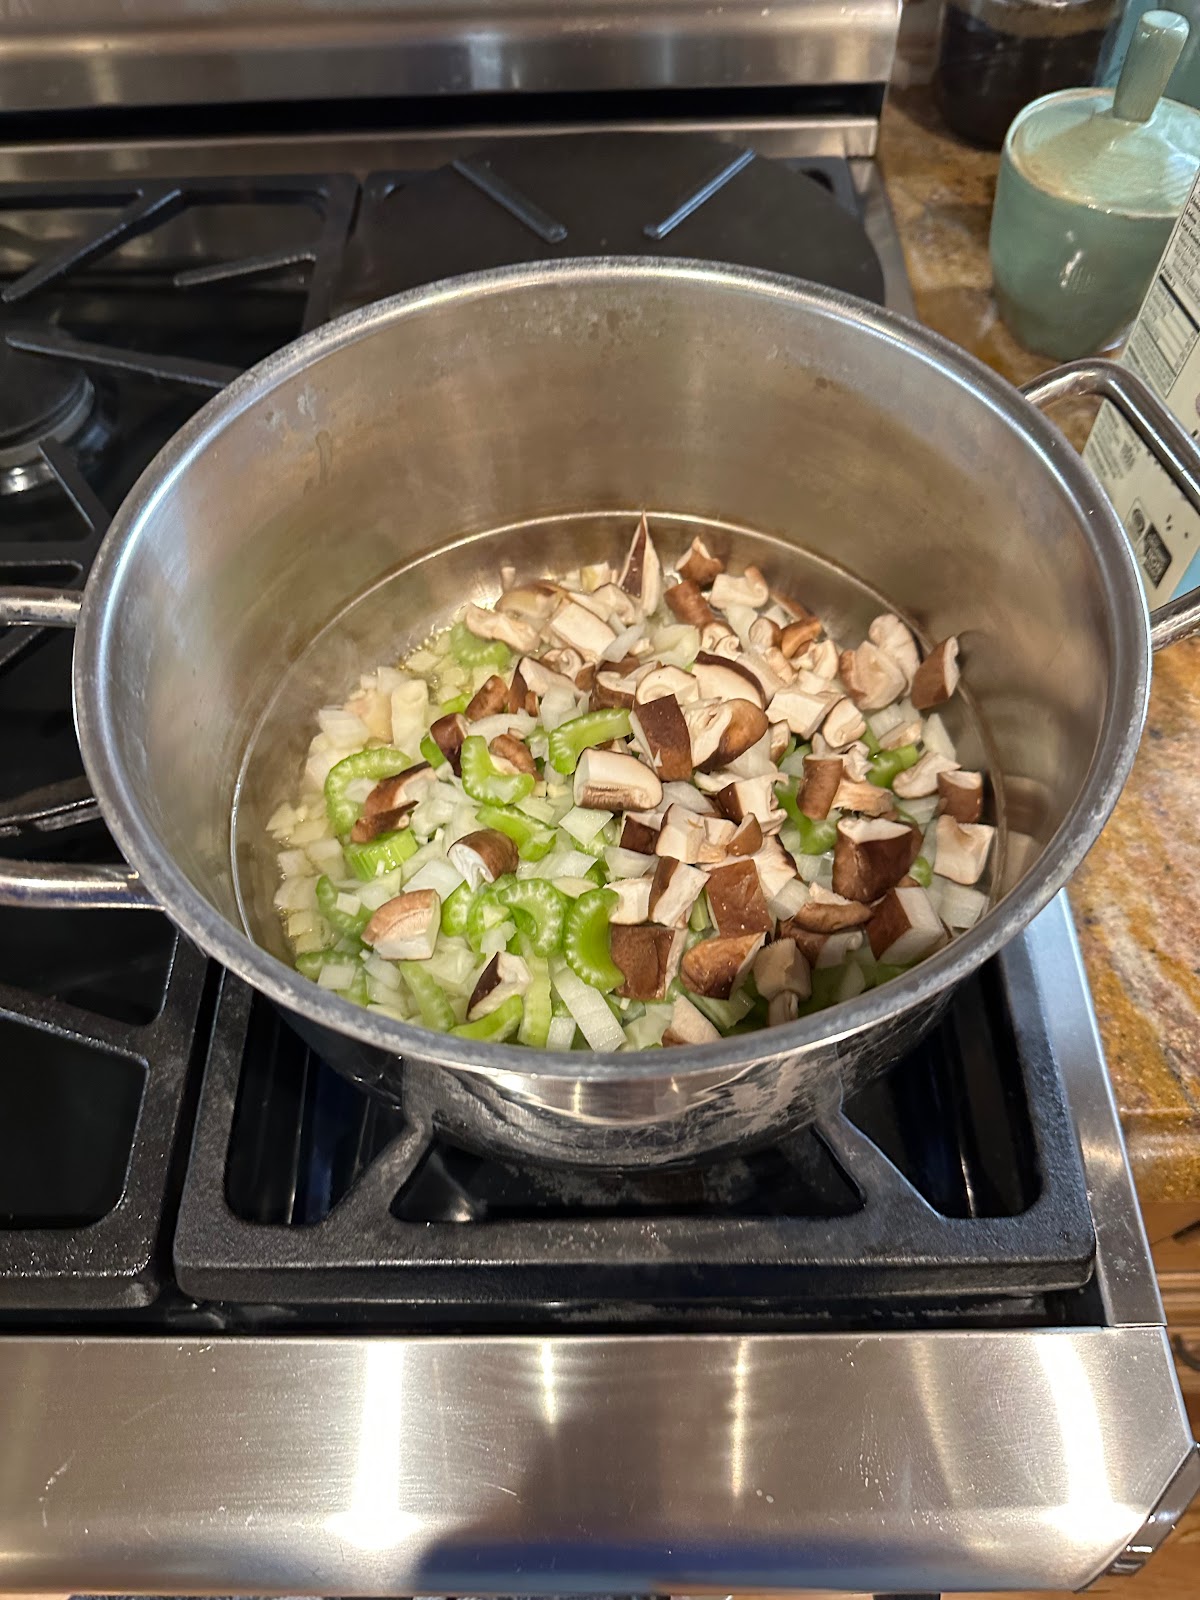
Chop and saute: 


Cook .. Just 30 minutes!

Add greens (chop first): 


And its done!


 The recipe: 

Vegetable and Lentil Stew with Sausage

This can be a clean the crisper drawer kind of soup, with any kind a vegetable


1-2 tablespoons olive oil 

1-2 slices of bacon (optional, good if you don’t use sausage)

2-3 links of pre-cooked chicken sausage (or use pork sausage – sauté instead of bacon)

1 large onion, chopped

1 to 4 carrots, sliced 

1 or 2 celery stalks, sliced (optional)

2 cloves of garlic

Red pepper flakes to taste

Rosemary (1-2 teaspoons fresh), bay leaves (2-3), and/or Italian Seasoning

More veggies as desired: mushrooms, cubed butternut squash or sweet potato, green beans, tomatoes

6 cups of liquid - 1 quart chicken broth plus 2 cups water (or all water or all broth)

1 pound of green lentils, rinsed 


1 bunch of greens (kale, mustard, chard), stalks removed, chopped (or baby spinach)


Herbs, lemon juice, salt, pepper, hot sauce to taste.


In a large pot, heat the oil.  Sauté the bacon if using.  Add onion, sausage, celery, garlic, chili (plus any veggies that would benefit from sautéing like mushrooms), plus salt to taste (I start with a ½ teaspoon).  When onions are translucent (5 minutes or so), add carrots and other vegetables, rinsed lentils, broth / water and bring to a simmer.  Cook for 25 or 30 minutes, until lentils are tender (don’t cook to the point of falling apart).  Add more water if desired. Add chopped greens.  Kale or mustard greens need to cook 5 to 10 minutes; baby spinach is done as soon as you have stirred it in. Taste – add salt, maybe a squirt of lemon juice, herbs, some pepper, maybe some hot sauce as desired. 

Monday, May 21, 2018

Bread Crumbs and What to do with them!


A new study about food waste came out this week, claiming that the typical American wastes about a pound of food per day.  And that the worst offenders were healthy eaters, because fruits and vegetables comprise 39% of the wasted food  (followed by dairy and meat).  What surprised me was that bread was not on this list.  I know I do better than most on using up fruits and vegetables, I have a lot of strategies ranging to buying really fresh product at the farmers market, to sweep-the-veggie-drawer recipes, like Pasta Whatever and Quesadilla's... just check the "Random Vegetable" link.   But it seems that I'm constantly tossing bread that is moldy or stale.  I know its in part because I buy bread that isn't loaded with preservatives, but the reality is that we just don't eat enough sandwiches or toast to go through a full loaf in a week or so. Or you get (or make) a nice "artisan loaf" to go with soup, and its stale the next day.    I do toss bread into the fridge after a few days, and it's still good for toast, but after about 10 days it's stale even for toast (and likely starting to mold).

So....  I have been trying a few new things.  First has been to get more proactive about making dry bread crumbs, which keep for a long time in the freezer.  But of course, this doesn't help unless you actually use the bread crumbs from the freezer.  I have a couple of recipes  that use bread crumbs, like Spinach Crusted Quiche, and meatballs (and hopefully will get around to posting that recipe).  But I needed more outlets for bread crumbs, because storing crumbs in the freezer for a year and then throwing out is not reducing waste.  I have managed to stumble across a few of recipes that use a lot of crumbs (by stumble, I mean I found one, then googled and found another 100 similar recipes, then pulled together the way that seemed best to me).  The first is a Bread Crumb Topping that you put on pasta or salads. This is something that really elevates a ho-hum salad or leftover pasta. The next is Oven-fried Zucchini.  Way back (we are talking about my college days) many people "discovered" that they liked zucchini when it was breaded and fried.  I will admit these are not quite the same, but they are quite tasty and actually pretty good for you.    How do you use bread crumbs?

First, let's cover making bread crumbs. You can use any kind; white, French, whole wheat, whole grain, seeded, etc., but I don’t like to use bread that is on the sweet side (> 2 grams sugar per slice according to the nutrition label), like a honey wheat or most of the whole grain breads.  Sugar will cause the crumbs to brown faster, which might be a problem in some recipes.  Plus I'm just not a fan of sweet tasting bread (and yes, I'm the crazy lady looking at the label of every loaf in the store).

Bread Crumbs

Leftover bread, preferably stale, torn into chunks.  Sandwich bread is fine as long as its not sweet.

Oven: 300F, convection if you have it.    Place parchment paper on a sheet pan (or pans, depending on how much leftover bread you have).

Place 1 - 2 inch chunks of bread into the bowl of a food processor, filling up to about half to three quarters full.  Pulse until broken up, go with longer pulses until the bread is in crumbs.    Put crumbs on prepared sheet pan.  Repeat if you have more bread.   Keep the crumb layer to less than a ½ inch.

Place pan in preheated oven.  Toss after about 10 minutes.  Then check every 5 minutes… goal is dry crumbs, not toasted crumbs.  It generally takes 15 - 25 minutes. Let cool completely.   If the crumbs are a bit big for what you want, give them another twirl in the food processor. Use dry crumbs within a few days, or put into freezer zip-lock bag and freeze, they are good for many months (at some point, they get that freezer taste).


Bread Crumb Topping

Good on pasta or salads.  But they don’t keep.  Use within an hour or so of making. This makes enough for 2 servings, double or triple as needed.  My inspiration for this recipe is from Melissa Clark of the NYTimes... that one uses anchovies.  Probably delicious, but haven't yet tried that!

2 tablespoons olive oil
2 cloves garlic, minced
Pinch of red pepper flakes
½ cup dried bread crumbs
2 tablespoons fresh herbs (such as parsley, thyme, oregano) or 1 teaspoon dry Italian herbs
Optional:  1 tablespoon finely chopped preserved lemon or olives
Salt and freshly ground pepper

Warm olive oil over medium heat in small skillet.  Add garlic and red peppers, stir, then add remaining ingredients.   Cook for a few minutes, stirring frequently until the crumbs are golden.  Add lots of pepper, and maybe salt (if you are using preserved lemons or salty olives, you probably don’t need more salt).


Breaded Zucchini

Serves 4 … but 2 people can finish this off if they are hungry.

Zucchini – about 8 small or 4 medium or 2 large, ends trimmed
1 cup dry bread crumbs
1/3 cup grated parmesan cheese
1 teaspoon Italian herbs
Good grind of pepper
1 jumbo or 2 large eggs
2 tablespoons olive oil
Salt

Preheat oven to 425F, use convection bake if you have it.   Line a sheet pan with parchment paper. 

If zucchini are small, just quarter (and maybe cut the quarters in half if you have long skinny zucchini.  If you have larger zucchini, cut into ½ inch slices. 

Mix the bread crumbs, parmesan cheese, herbs and pepper in a shallow dish.   Beat the egg(s) in shallow bowl 

Dip each piece of zucchini in the beaten egg, then drop into the crumbs.  Press crumbs on all sides.  This goes a bit easier if you have one “wet” hand for the egg dip, and one “dry” hand for the crumbs.  Place each coated piece on the prepared sheet pan.   Drizzle the coated pieces with the olive oil.  

Bake for 20 – 30 minutes, until brown and crispy.   No need to turn!  Sprinkle with salt when they come out of the oven.  Serve immediately with ranch or bleu cheese dressing, or marinara sauce.


Ranch Dressing

1 small clove garlic, minced
1 tablespoon lemon juice
¼ cup mayonnaise
¼ cup plain yogurt or buttermilk
     Or use Greek yogurt and less mayonnaise
1 teaspoon dill or other fresh herbs
Few drops of soy sauce
1 – 2 drops of hot sauce
Salt and pepper

Place the garlic and lemon juice in a small bowl while you get the rest of the ingredients together… this helps tame the raw garlic.   Whisk everything together.  Chill until ready to use.  Keeps for a few days.


Sunday, June 18, 2017

No-Knead Whole Wheat (or Rye) Sandwich Bread


Buying good bread seems harder ... and more expensive ... than it should be.  Making your own bread is cheap (the cost for ingredients for this recipe is less than 50 cents!) and good. But for most of us, baking bread, doesn't fit into our modern lifestyles.   Using traditional methods, there is the kneading (or cleaning of the stand mixer), then the "being around" for a good 4 or 5 hours for it to rise, punch down, rise again, form, rise again, bake.  So through some internet searching and experiments, I have put together the following recipe, which makes 1 loaf.  It takes just one bowl and no kneading. It's mostly whole wheat, although you can use all bread flour or a combination of bread flour and AP flour.  You can also use some rye flour for a change of pace. The flavor is nicely developed by the use of some sourdough starter and a long rise in the fridge, so you don't need to be around for 5 hours straight. You do need to be around a couple of hours for the final rise and bake, but that seems manageable, at least for me.  As with all yeast products, the rise time will vary with kitchen temperature...  if the kitchen is warm, the rise times will be shorter. 

Typical timing to make the bread: 
Before bed - get Blob (the sourdough starter) out of the fridge
Next morning - feed blob
Before lunch -- make dough (and replenish Blob)
After lunch - put dough and Blob in the fridge
The morning of the day you want fresh bread - get dough out and form loaf, let rise and bake...


Whole Wheat (or Rye) Sourdough Sandwich Bread

150 g sourdough starter (see below for care and feeding of a starter)
400 g water                          
1 teaspoon active dry yeast
2 teaspoons sugar
100 g bread flour
400 g white whole-wheat flour, or 100 g rye flour plus 300 g www flour
1 ½  tsp salt
Olive Oil

In medium-large bowl, combine sourdough starter, water, yeast, and sugar.  Stir with a sturdy spoon (or dough whisk) to mix.   Add the flours and salt, and give a very good stir (a minute or so).  The dough will be soft and sticky.  Let rise at room temperature for about 1 hour, and then put in refrigerator for at least overnight, and up to 5 days. The dough will get more sour with more time.


When you are ready to bake, take bowl out of refrigerator.  Prepare a 9” x 5” pan by oiling (rub around about a 1 teaspoon or so of olive oil) and flouring.   Scrape the dough on to a floured surface (like the kitchen counter), then pat into a rectangle about the size of the bread pan. Handle the dough gently, with as little flour as needed to keep from sticking to hands and counter. Stretch the dough to 3 times the width of the pan (so about 9” x 15”). Fold the dough into thirds, like a letter. Turn 90 degrees, and stretch dough the long way, to (so about 5” x 27”), and fold into thirds.  Turn one more time, and do it again like the first time. When you are done, it should be about 9” x 5”.  Pinch the seams, and put into the pan, seam side down.  Cover and let rise for 1 hour, or until doubled in bulk.

Preheat the oven to 450 oF (this takes a good half hour, so start the oven 30 minutes after the bread is in the pan).   Use convection bake if you have it.

Score the top of the loaf with a sharp paring knife about ¼” deep, then place the pan in the oven and bake 10 minutes. After 10 minutes, reduce the heat to 350 oF and bake another 40 - 45 minutes.  Bread is done when crust is golden, internal temperature should be at least 190 oF (and 200 oF or higher is OK).

Unmold by turning out the loaf to a rack. Let cool completely before slicing.

Also... Sometimes I will make a smaller loaf in a 5 x 5 pan, this uses half the dough (and about 5 or 10 minutes less to bake). That is what I am showing in the pictures.  More work, but fresh bread twice a week!  


Care and feeding of a starter:

My starter is nicknamed Blob, and he’s been around for about 8 years now. It's what I use to make pizza dough too.  If you want some, just let me know!  These instructions assume you have some of Blob to start with.

Blob needs to be fed every week or two.  I use the following method so that I don’t have to throw any starter out (assuming I am making dough).   In between using, he stays in the refrigerator.  A couple of notes:  You want to use non-chlorinated water… tap water that has been through a filter is OK or bottled water.   This is what they call a 50% hydration starter, so you always use the same weight of flour and water.  I generally err to the side of too much flour.  

At least 6 hours before you want to make dough, pull Blob from the refrigerator to warm up (or do the night before).  After it’s up to room temperature (2 or 3 hours), or the next morning, add 1.5 ounces of all-purpose flour and 1.5 ounces of water, stir well to combine.  Let sit for another 3 hours or so, it should be nice and bubbly and ready to make dough.  After you take enough out to make the dough, add another 1 ounce of water and 1 ounce of flour, stir well, and let sit until its bubbly again (3 hours). If you have used more than 5 ounces to make the bread (including what you lose on the spoon), increase the amounts accordingly.   It’s ready to go back into the refrigerator.   Every so often, transfer Blog to a clean container. 

If Blob gets a little gray around the gills (like if he has been neglected for a few weeks), feed a couple of times, throwing out the excess. As long as it gets happy and bubbly again, its fine.  If it gets pink or other colored, I would start over. 

Sunday, May 7, 2017

Potato Hash


I think I finally have a theme for a cookbook: 1-Skillet Dinners.  At least once a week I make something that falls into this category:  Stuffed Quesadillas, Fried Rice, Frittata, Sautéed Chickpeas, Scrambled Eggs.    Here is another one to add to the list:  Potato Hash.  Like the others on this list, it's a vehicle to use up miscellaneous veggies in the fridge, maybe left-over meat, and quick to put together.  To make a cookbook, I would just have to do ten versions of each of these...  The Meat-lovers, The Vegetarian, The Superfood version (i.e.salmon, kale and quinoa), then the seasonal versions, Winter, Spring, Summer, Fall.  Then maybe fill it out with a gluten-free vegan challenge...

Of course, it seems silly to actually follow a set recipe for this type of a meal, as one of the things that makes these quick to make is not having a "real" recipe, where you would measure and have to have specific ingredients.  Would love some feedback on this... Do you like to make it up with some basic guidelines, or a "real" recipe?

Potato hash has always been one of my favorites, but it didn't often make into the rotation, since you traditionally start with cooked potatoes (whole boiled potatoes), which I rarely happen to have in my refrigerator at 6pm when I want to make dinner.   But then I stumbled across a shortcut in the Serious Eat Blog that really works:  par-cook cubes of potatoes in the microwave.  You just cube the potatoes, put them on a dinner plate, cook for a few minutes, then into the skillet.  You can use any kind of potatoes. Russets are usually, recommended, but have been happy with red, gold, and even sweet potatoes.  I even mix potatoes if I have a bunch of small ones.


So, like the other dishes in this series, I am just giving some guidelines, not a "real" recipe.  Feel free to improvise and adjust to your taste, and what you happen to have around!

As to quantity, look at the amounts of each component to decide how much you want to eat.  Double if cooking for two, adjusting plus or minus for how much they eat compared to you. I don't ever make this for more than two, since my skillet isn't big enough (I like to use a non-stick skillet, and the biggest one I have is 11 inches").  It does look like a big pile when you start, but it shrinks some when it cooks.   I like this best with broccoli or greens like swiss chard or kale, but use what you like.  I do always use some onion (or a shallot, or green onions), and most always red bell pepper.  Meat is optional.


And last, I like to top this with something. Usually it's a fried egg (done in the same skillet, it just takes a couple of minutes after the hash is done), but sometimes shredded cheese, and/or a half an avocado.  Chopped herbs will make it seem fancy.  And ketchup is a traditional topping, although honestly I don't even have any in the house.

So, here is a start, improvise to your taste!

Potato Hash

One serving, double for two

Any kind of oil, or bacon grease (about a tablespoon)
Enough potatoes (about 1 medium-large russet or equivalent amount of any kind of potatoes)
   If you have boiled potatoes, skip the microwave step…
Salt
Pepper
¼ of a an onion, diced
Red pepper flakes

Veggies:
¼ of a bell pepper (any color, but I like red best)
A good handful or two of a green vegetable or 2:  Broccoli (small florets), or any kind of greens (kale, swiss chard, spinach), or diced zucchini.  Leftover roasted or steamed veggies are OK.
Other options: mushrooms, sun-dried tomatoes

Optional:  Bacon, ham, or leftover chicken, any kind of leftover grilled or roasted meat.

Toppings:  Egg, and/or shredded cheese, avocado, chopped herbs, sour cream, ketchup

Dice potatoes, place in a single layer on a plate, then microwave for 2-3 minutes per serving.  They don’t need to be cooked through, but good and hot and have lost the raw crunch. Taste a cube to check.  Careful – the plate can get hot.

If using bacon, slice the bacon into half-inch pieces, then put into a 10 – 11” nonstick or cast iron skillet. Add a little water (a couple of tablespoons or so, this will keep it from spattering), and turn on medium-high heat.  Cook until the bacon is crisp.  Remove bacon and leave the grease.  If not using bacon, heat a tablespoon or so of your favorite oil (enough to nicely coat the bottom of the pan) over medium-high heat.

Add the potatoes to the hot skillet, sprinkle with a good shake salt, and a big grind of pepper.   Shake, then let brown.  If you are using mushrooms, add them now.  Once one side of the potato cubes are brown (this takes a five minutes or so), toss, then add the red pepper flakes, onions, bell peppers, and any longer cooking greens (like raw broccoli or zucchini).  Just leave them on top to start cooking as the potatoes continue to brown.  Toss again, now cooking/browning everything in earnest.  Add study greens like kale at this point.  When it’s almost done add any meat, sun dried tomatoes, or leftover veggies (just want to heat through, not really cook), and tender greens, like baby spinach.  Add more salt and pepper to taste.   Remove to serving plate(s) or a dinner bowl(s).   If using an egg to top, add a bit more oil (or butter) to the pan, and quickly fry the egg.

Add the egg to the top, along with other optional toppings – bacon, cheese, avocado, herbs, etc.